
The Do's & Don'ts of Measuring & Marking

Marking and measuring is one of those fundamental tasks which has to be learnt very early on in any woodworking career, usually at new entry hobby level, where it’s mastered after some trial and error or expensive mistakes. It amazes me that many find such a relatively easy task so difficult, so here are a few ‘Top Tips’ in no particular order. Feel free to join in or add any of your own on our Facebook page or follow us on our Pinterest page.
Top Tip No. 1
Forget pencils. A pencil line has thickness, so which side of the line is the measurement taken from? Accurate work demands something far more precise which is a knife line, cut into the surface of the wood. To be absolutely fair, I do sometimes use a pencil, especially for marking out dovetails, but it’s always a 4H grade and sharpened to a needle point. Thicker pencil lines are acceptable for marking out rough timber and for the face side/edge marks on newly planed surfaces.
Top Tip No. 2
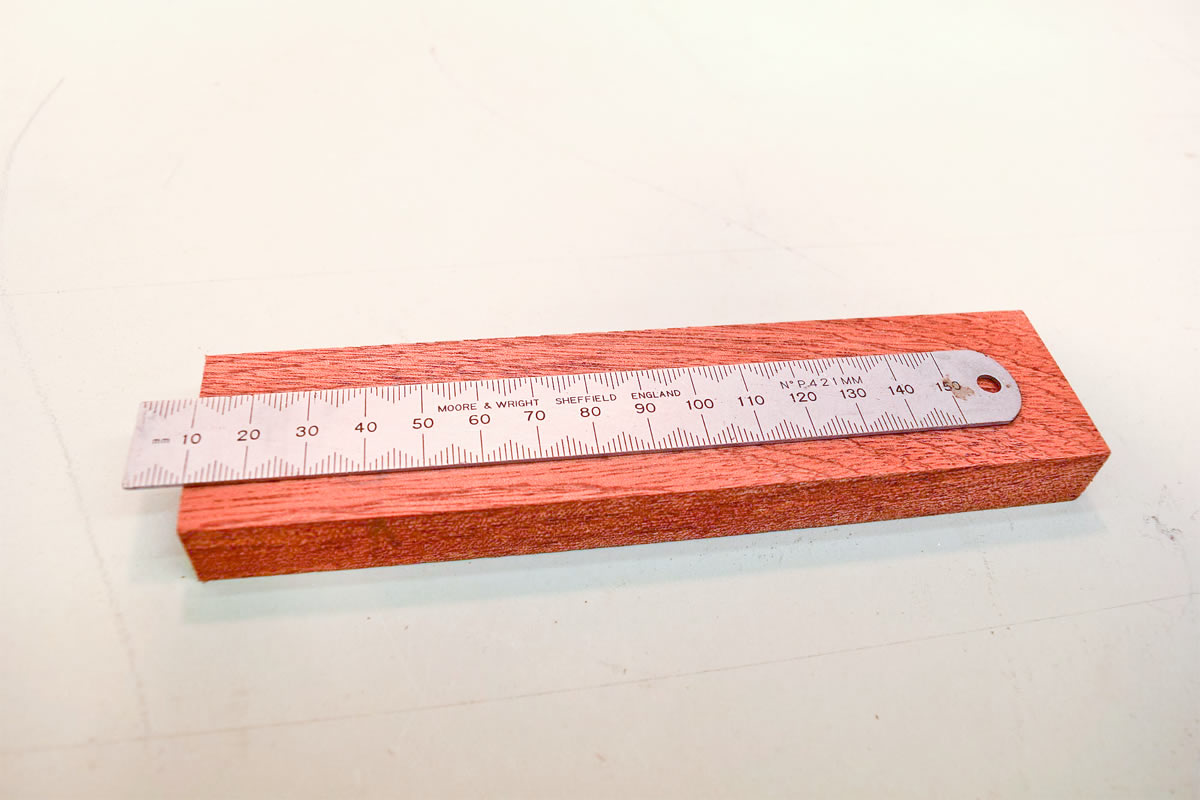
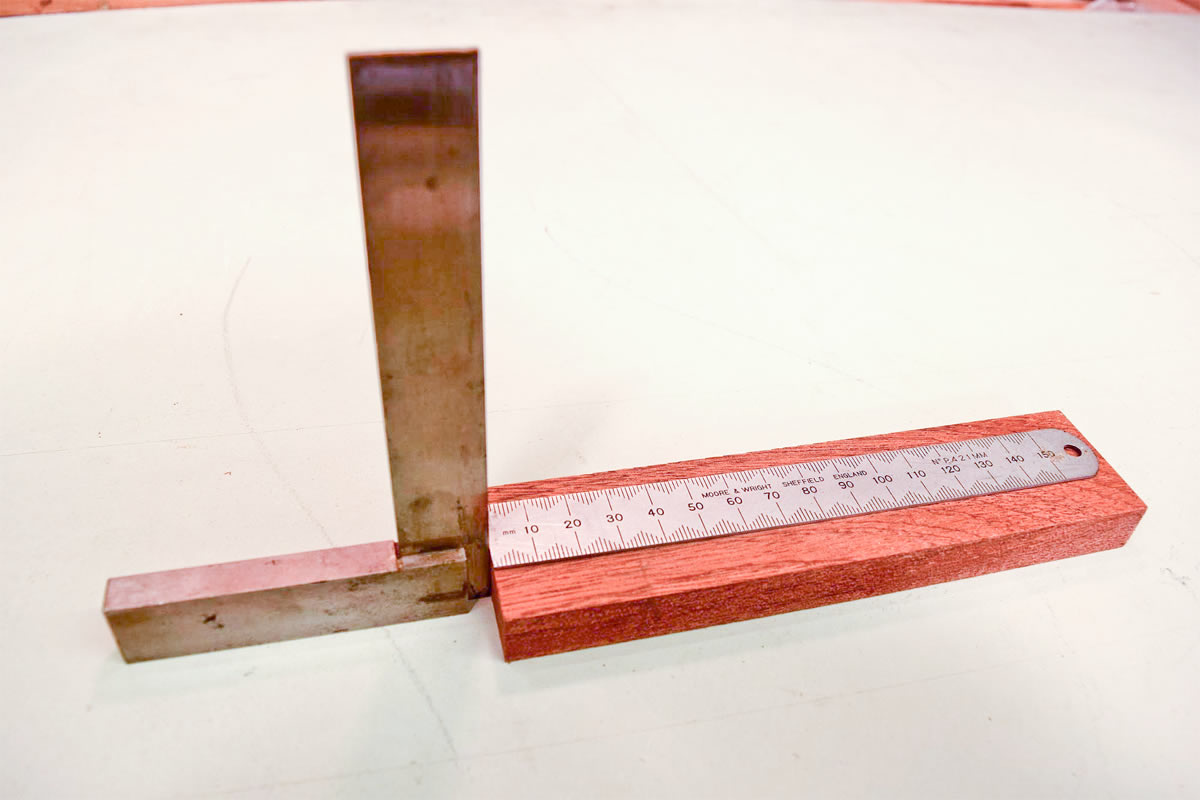
Do use a decent, high quality steel rule, preferably one without a mangled end where it’s been used to lever off a tin lid...keep your best chisels for that. On second thoughts, probably best not to. If you have difficulty in lining up the end on the piece of wood, start from the 10mm line, but please, please remember to add an extra 10mm at the other end. Here speaks the voice of bitter experience. If the timber is dead square at one end, place a try square blade hard against it and move the rule along until it touches the square. The end of the rule will then be exactly in line with the edge of the timber.
Top Tip No.3
Use a good quality, sharp marking knife, for example a Japanese Kiridashi or a double bevel spear point. The back should be flat, so that it can be positioned snugly against the square. A very thin double bevel spear point is useful when marking out the pins on a dovetail joint, especially if the tails are very close together. Do NOT use, under any circumstances, a blade similar to that from a craft knife, where the bevel is ground on each side as it’s difficult to tell when the cut is truly adjacent to the edge of the square.
Top Tip No 4
Make sure you use a good engineer’s steel square for marking out, particularly for fine cabinet work. Do NOT, under any circumstances, drop it especially onto a concrete workshop floor as the impact will almost certainly throw the blade out of 90° alignment with the stock. Check it routinely by marking a line and reversing the stock through 180°. If the lines are dead parallel or overlap, then the square is true. If not, discard!
Top Tip No.5
Always use the prescribed face edge and face side marks which will indicate two datum surfaces which are true and square to one another.
Top Tip No.6
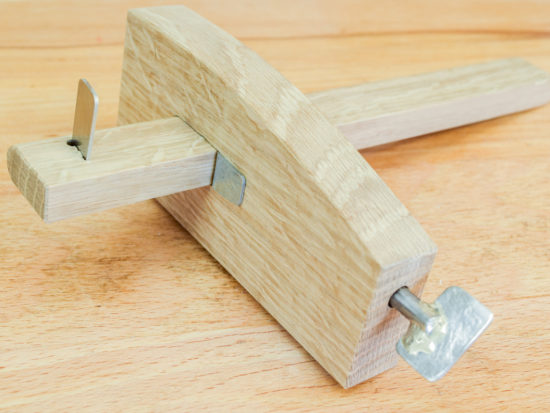
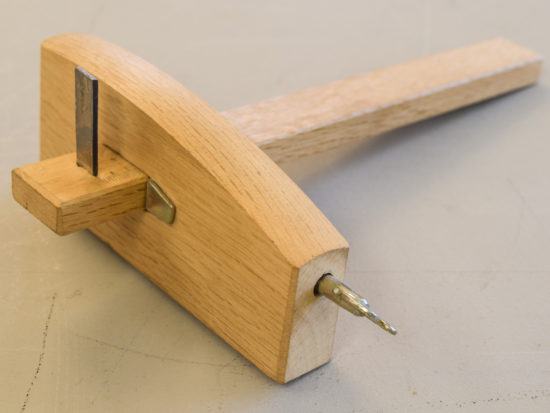
Marking gauges are difficult to use, particularly if you’re new to woodwork. The traditional 'pin' type is still used by many, but the relatively recent introduction of the wheel type gauge has made this awkward task a lot easier.

Top Tip No 7
If a cut is to be made on the line, it can be enhanced by chiselling from the waste side to form a shallow groove, which means that the saw blade will sit directly on the waste side of the line. All you have to do then is to saw squarely.
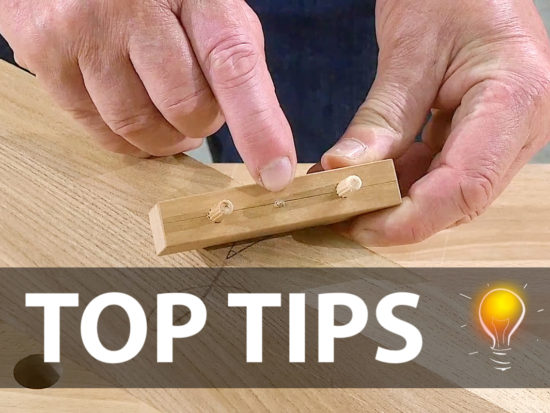
Top Tip No. 8
When scribing a line to a surface, there are a few little gizmos produced to make this simple task easier. They’ll all set you back a few euros which could otherwise have been spent on something far more useful, so for the last tip, here’s a neat little trick that won’t cost you more than the price of a shirt button or steel washer (see pic above).
There will be many other useful Do’s & Don’ts and it would be enlightening to see them either as a reply to this blog, a comment on our Facebook page or by following our Pinterest page. Alternatively, there’s always the letter to the Times.

Many thanks for the tips, most useful for all and you gave me a couple that I was not aware of.
That washer tip is brilliant, will give that a try
A shirt button works just as well provided the pencil point fits through the holes.
Nice job Rob
I hope that's a 4H pencil you're using in tip 8 :) Great tips all useful
looks like a 6B
Lifted from t'interweb, so I've no idea what grade pencil is being used in the pic.
2B or not 2B, that is the pencil!
Good list Rob.
How about:
Using a ridgid steel rule on edge and dropping your knife down the etched graduation onto the work, which affords accuracy and repeatability.
filing the point of a making gauge into a single bevel, crescent knife point.
And never forgetting... Measure twice, cut once!
Mitch
The marking gauge pin is a good point. I've made a few gauges and I used a hardened steel masonry nail, suitably ground into a crescent shaped blade for the cutter. As for the traditional axiom of 'measure twice, cut once' I've been known to 'measure thrice' and the wood's still too short when it's been cut.
Great to see so many comments, many thanks indeed.
All steel rules are not made equal- some may have rough sheared edge at the "0" end which can throw off measurements ever so slightly, but a little bit of careful draw filing can correct this and bring the rule up to dimension. A slightly out of true square can be corrected with some careful draw filing, but a little skill is required.
I agree, but I think if a decent quality rule is used then this is unlikely. All my rules are either Rabone & Chesterman or M&W, as in the pic. Personally, I wouldn't even attempt to true up a square unless it could be tested against a reference which was better than grade 'B'. For me, if the square's out it should be discarded and a new one bought as a good square (good enough for cabinet work) isn't particularly expensive.
Just one thing here.It's something I've noticed in various publications.The wheel marking gauge is NOT a recent introduction.For all those doubters,have a look in the Stanley Tools catalogue no.34 from1929.
Peter, not being a tool 'collector' (except for a few measly planes...is a Norris A1 measly?... under the bench) I stand corrected. Many thanks.
If your marking knife goes AWOL then whip the iron out of a smoothing plane and use that flat side outwards. And I can barely see knife marks and so I do use a pencil mostly. BUT it is a Staedtler clutch pencil with 2mm thick leads which I sharpen to a CHISEL end, both sides, on sandpaper glued to a scrap of plywood. A fine sharp line all day long.