
The Resourceful Woodworker investigates UJK Technology Router Bushes
Like them or loathe them (and many do), the router is by far the most versatile power tool in the woodworker’s armoury. Correctly set up, it provides unparalleled accuracy as well as the ability to make repeat cuts, but these advantages do come at a price. First and foremost, there’s the noise which is probably the main culprit for many users, though a decent pair of ear defenders will do much to cut it down. Second and foremost, there’s the dust, much of which can be sucked away if a good extractor is used. Finally, there’s the cost of the router cutters themselves and all the other paraphernalia needed to use the machine effectively, especially if it’s used inverted in a router table.
One area of routing which I’m less familiar with is using bushes. Over the course of the next few Blogs I intend to explore how to use the UJK Technology Router Bushes. The set is made from brass and comes in a very robust black plastic container, complete with comprehensive dimensions (in metric) of each bush on the inside of the lid.
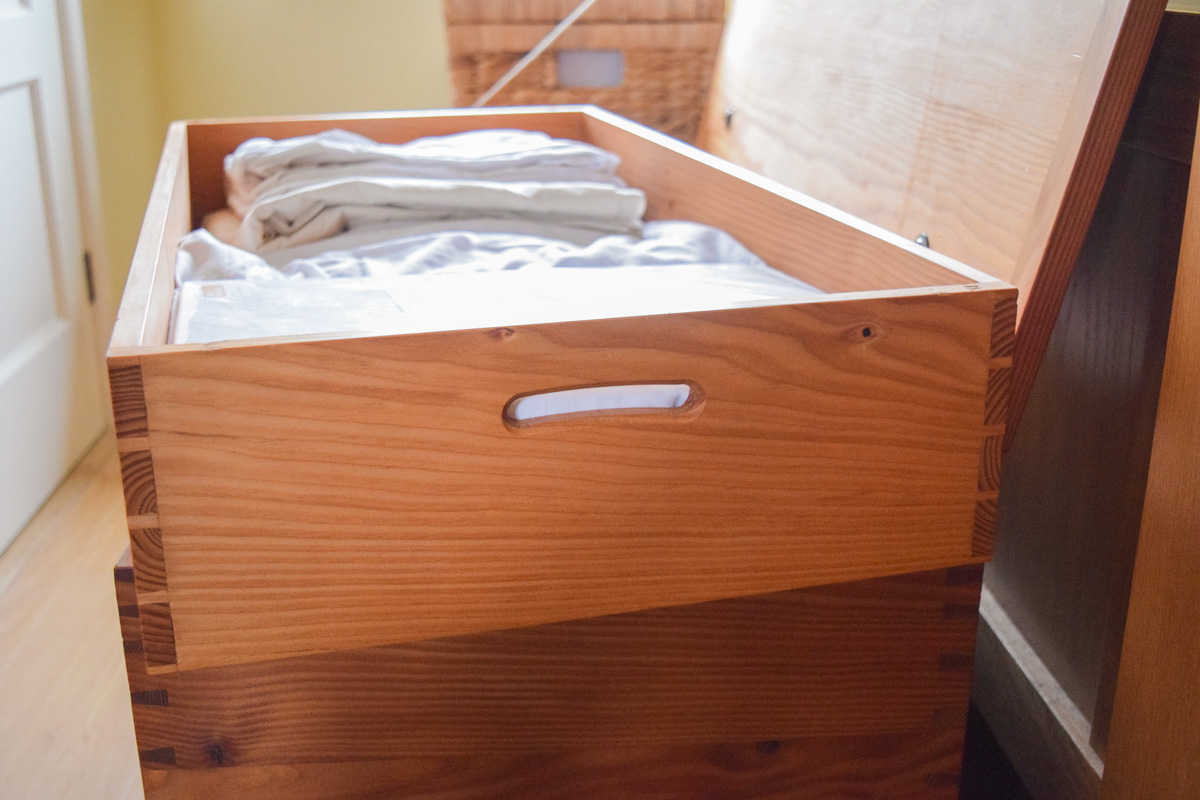
To say I haven’t used router bushes is a slight untruth as I did in fact use one many years ago to make the curved handle slots for the tray in a blanket chest.
The template for the curves was made using a ‘shop made jig which functioned similarly to this one. Having produced the curved template, I seem to remember cramping it in the correct position on the ends of the tray, inserting the appropriate bush and cutter in my router and then producing the curved handle slot.
What’s the advantage of using router bushes...and why?
The simple answer is that using the bushes in a hand-held router (or in the UJK Technology Router Table) enables the woodworker to make almost any ordinary router bit function as a bearing guided cutter, as used in template work.
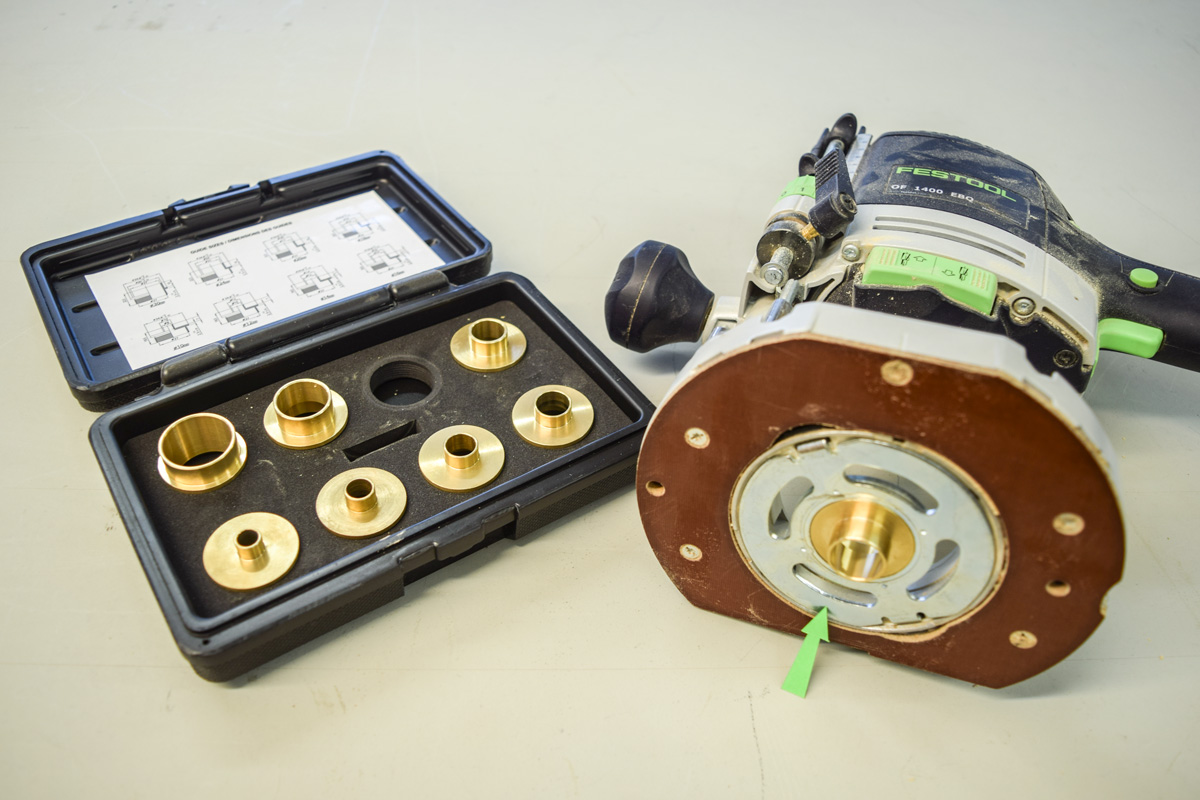
Setting up the bushes is easy. I use a Festool OF1400 router and the only additional item that you’ll need is an adaptor plate (arrowed) which is different for each router.

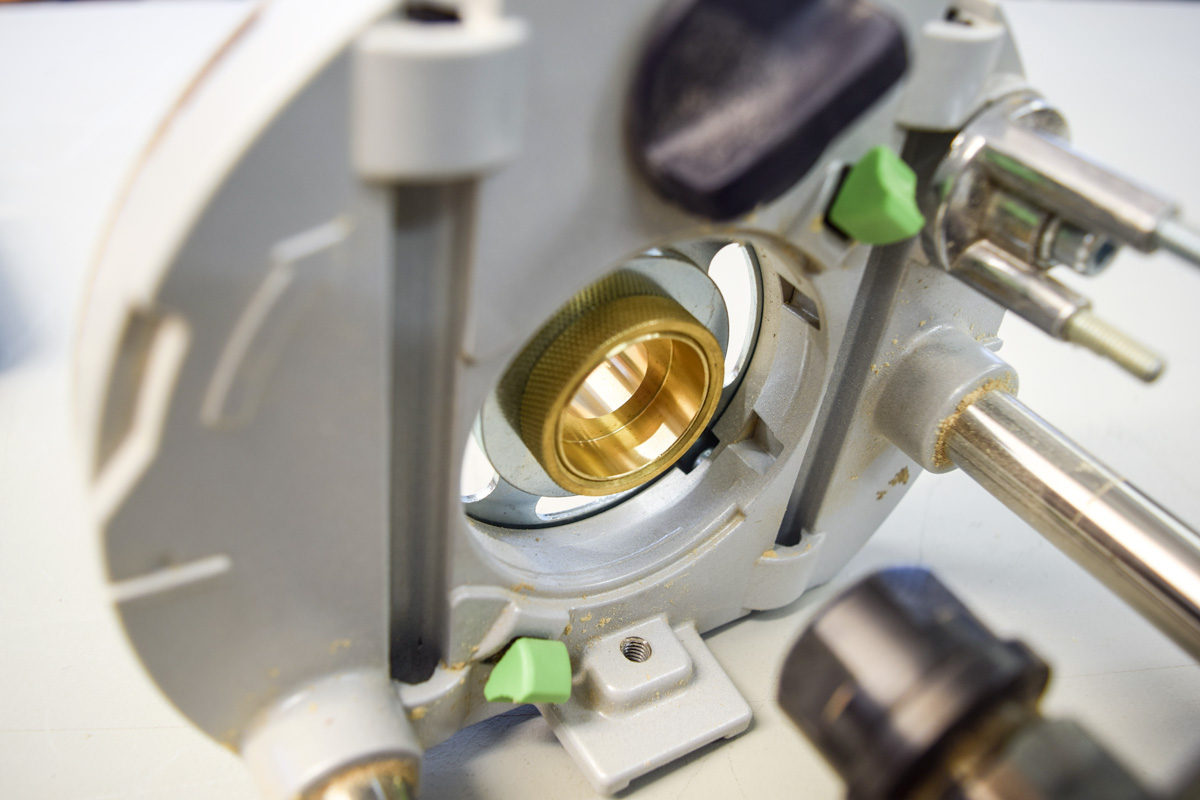
With the plate fitted, insert the appropriate bush and then lock it in place by screwing the brass collar in position on the reverse side. The router cutter can then be inserted into the collet in the normal way.
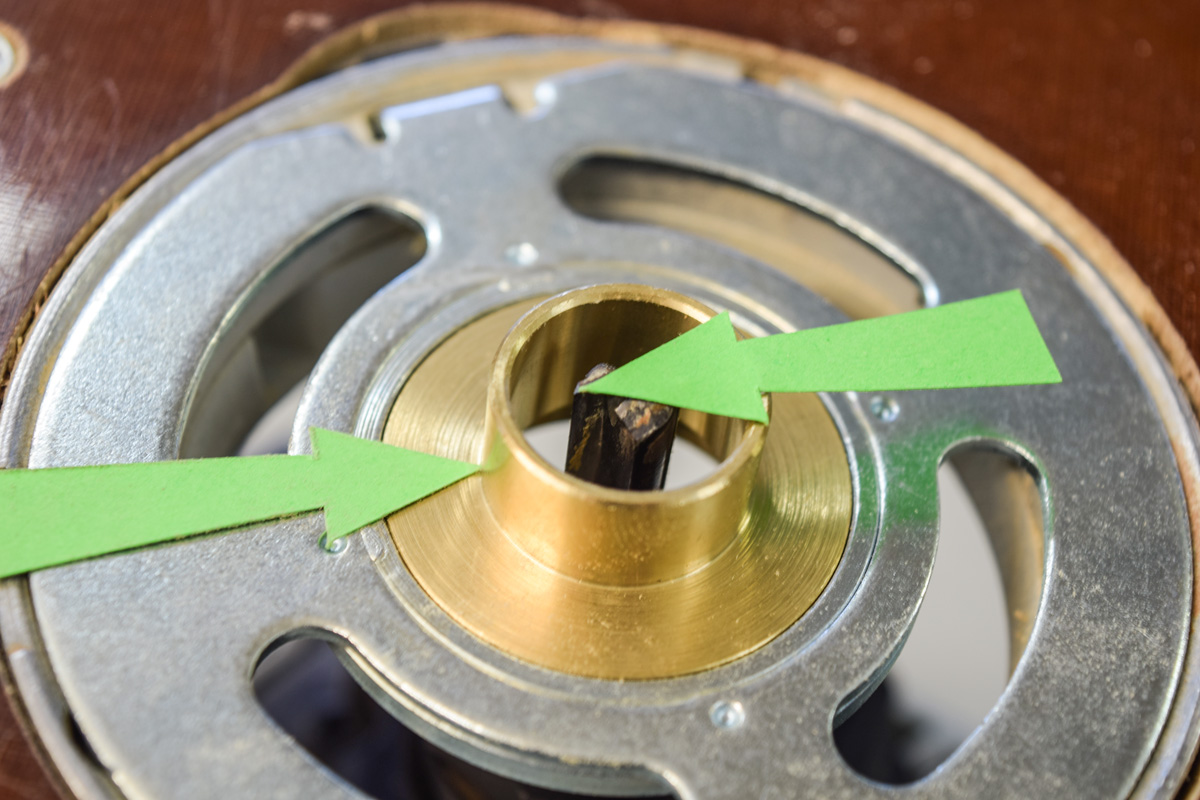
When using router bushes, the important thing to understand is that there will always be an offset, shown arrowed, which is the distance from the edge of the cutter to the outside (or bearing) edge of the bush. Thus, if a 20mm bush is used with a 10mm cutter, the offset is 5mm (20-10÷2). The dimensions given for each bush on the inside of the box lid also allow us to calculate the offset with different cutters. It’s the ability to change the offset by using a different cutter/bush combination which allows us to do some quite interesting stuff, which I hope to explore more fully.
In the meantime, if you have any experience of using router bushes or are able to contribute to the discussion, please don’t hesitate to leave a comment in the usual place.

The list of routers that the adapter plates are for does not include my large Triton, will any more be added?
In all honesty, I don't know the answer to that one. My advice would be to contact Tim Styles direct.
I find that the easiest way to work out the offset is to simply use them. By that I mean fit a variety of bushes and bits in combinations and then route a section of wood which you can then measure up accurately with a set of verniers. If you then mark up on the test piece with a Sharpie the combination and the actual measurement it can then be kept as a reference guide for future use.