
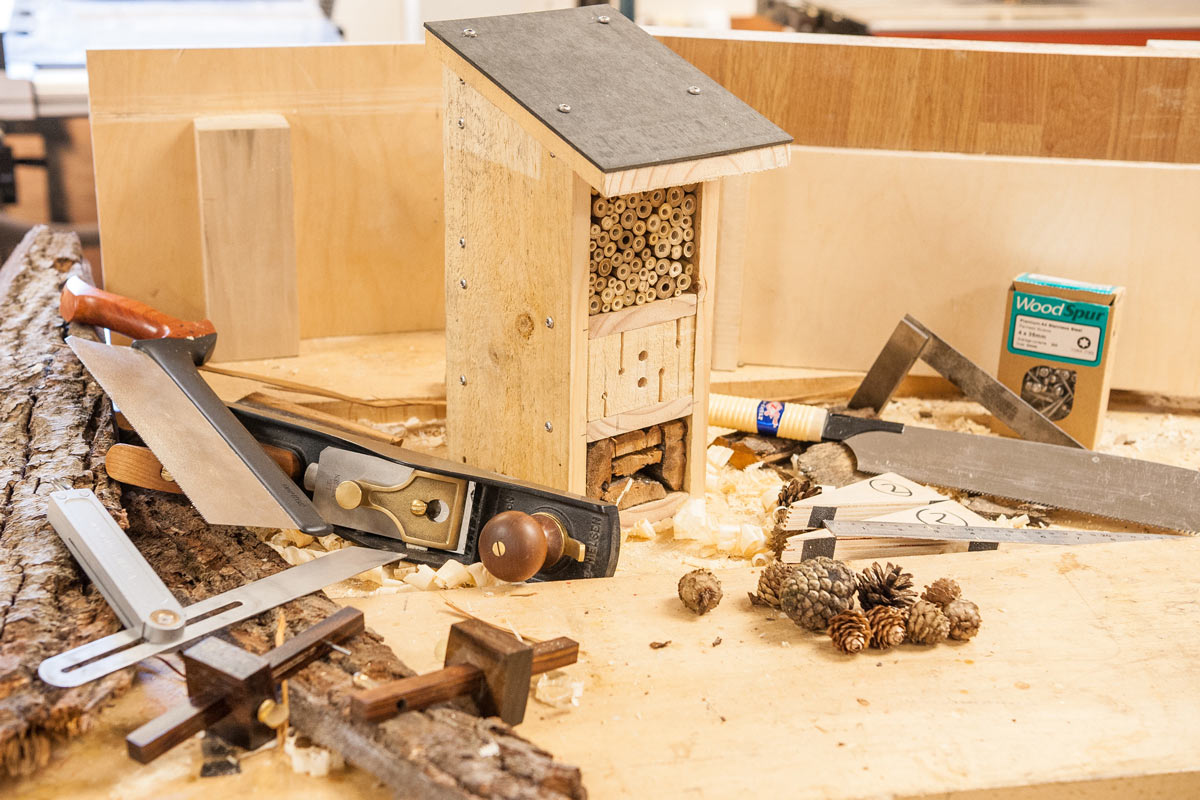
How To Build A Bee and Bug Hotel
Making a Bee and Bug Hotel for the garden is a great way to start a woodworking hobby and it’s a huge benefit to the little ecosystem that is your back garden.
It’s also the perfect way to get children interested in woodworking and nature and can be made by children (under constant adult supervision).
We have recycled some scrap wood from an old pallet but you can use any wood that you desire. What’s important is that the wood is untreated otherwise it will kill your guests and this is also why no glue has been used in the project.
What you'll need
Making The Side Panels And Central Dividers
Step 1
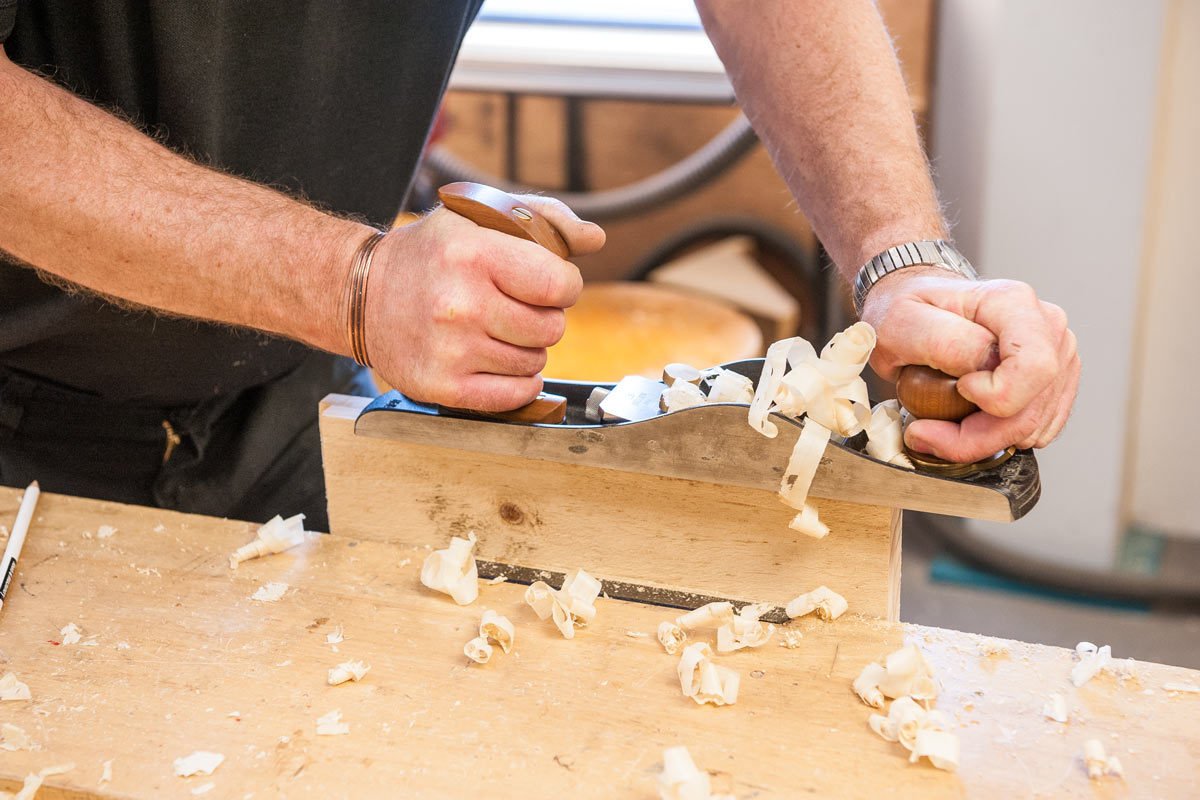
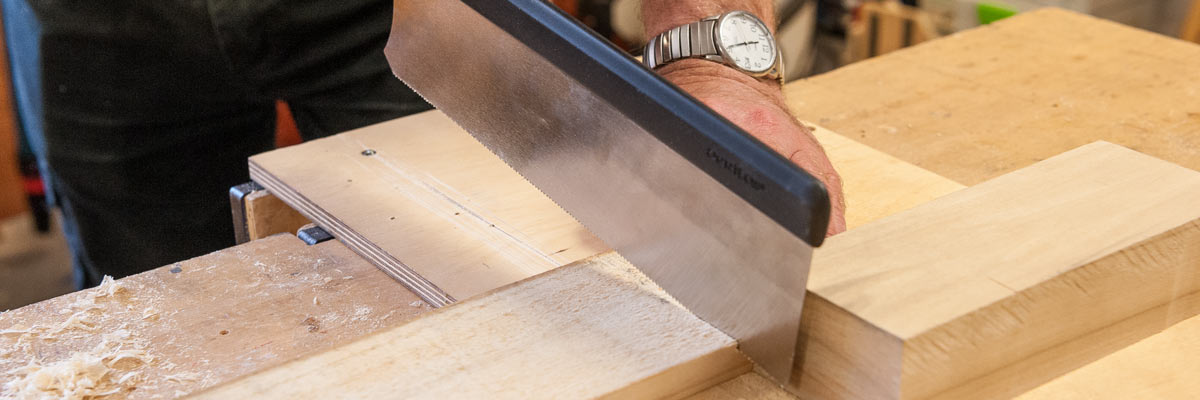
Using a hand saw cut up the pallet into usable lengths. Having selected the timber for the sides, plane up one side edge of each board, check this is straight and square then mark out and cut your sides to length.
Step 2
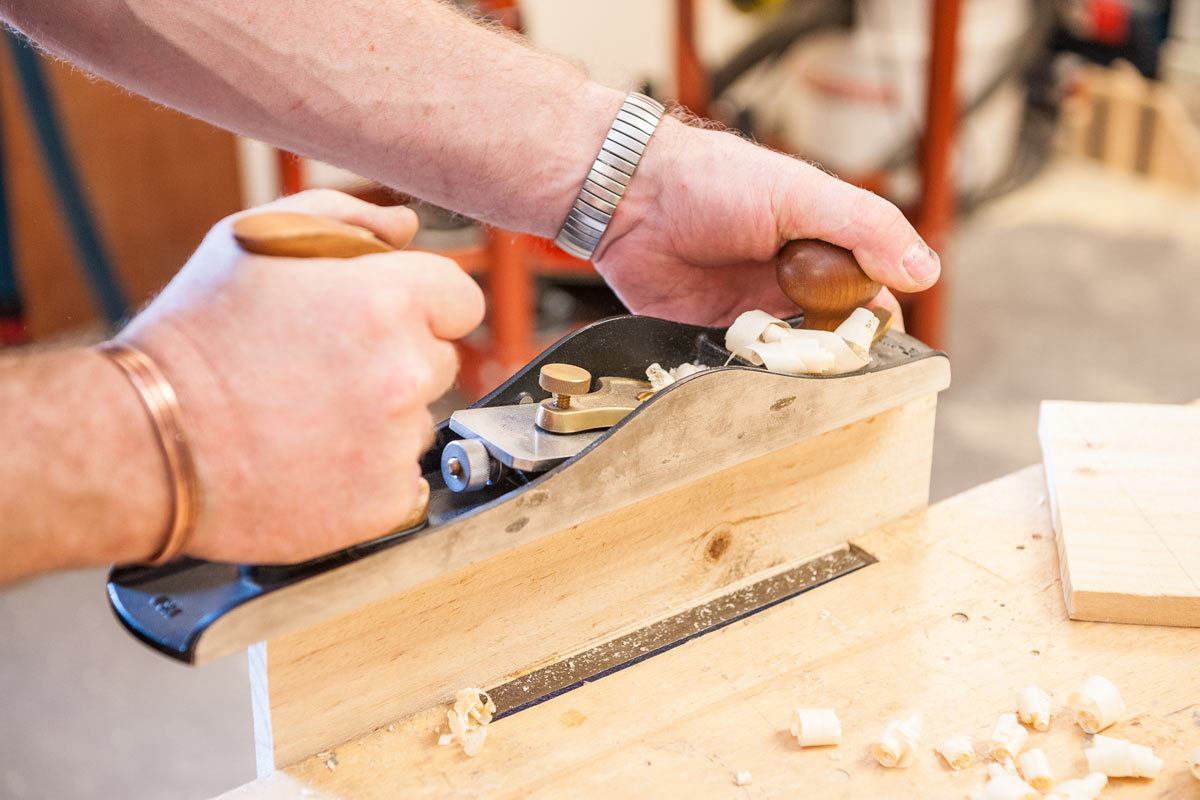
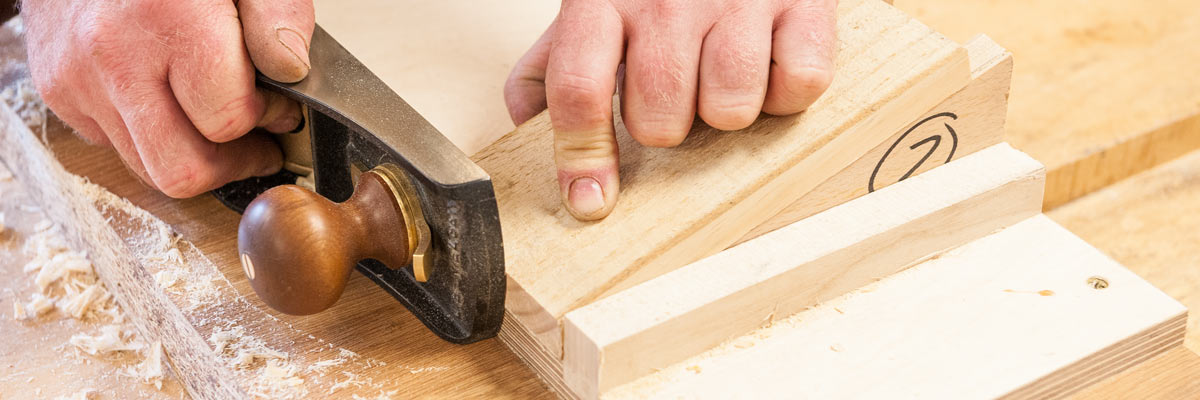
Using a shooting board, plane one end of each of the side boards creating a square corner. Check this is square.
Step 3
To ensure that the two side panels are the same, temporary tack them together with double sided tape. Check that the planed sides are squared and that the ends line up.
Step 4
With the two sides held together, parallel the width of the boards using a plane; the wider thickness of the two boards will make the plane more stable and this will help to get a square edge.
Step 5
Set up a sliding bevel to the angle of the roof pitch (ours was set to 15 degrees) and with the two boards fixed together mark out the roof angle. Cut the waste off using a hand saw and a bench hook.


Step 6
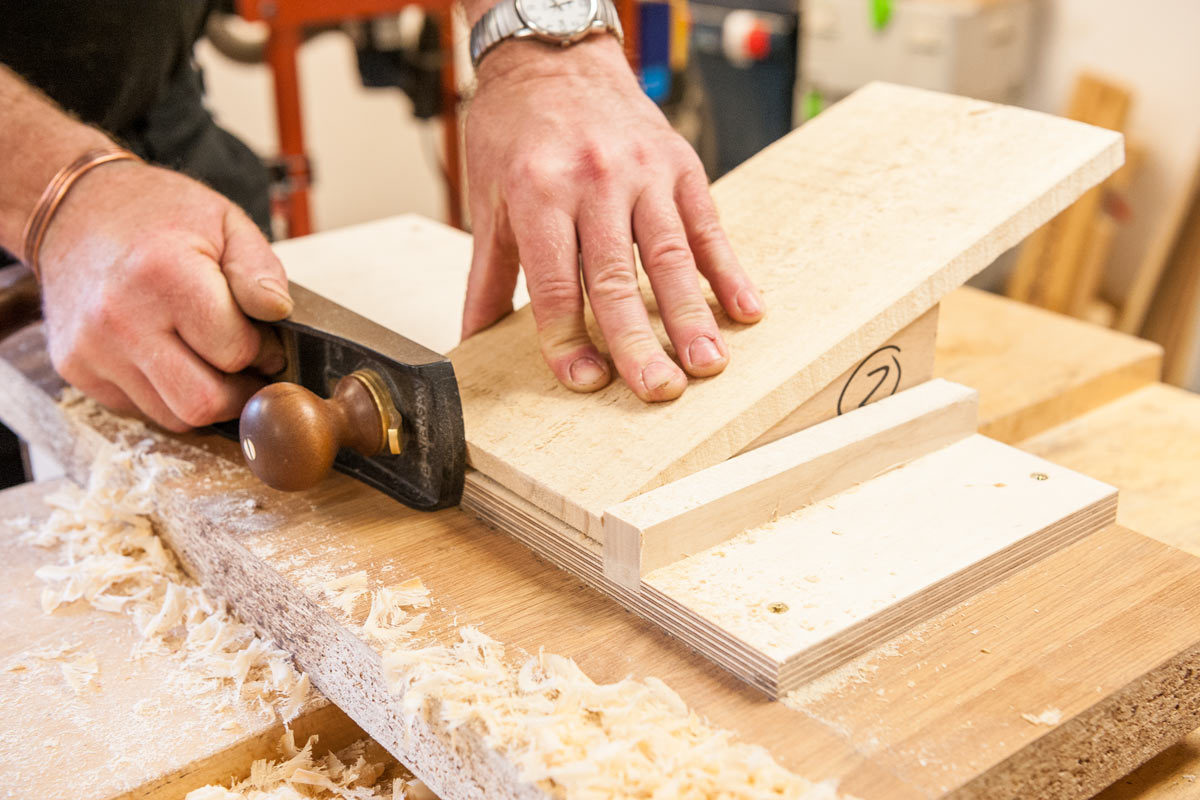
Select the board for the roof, mark the overhang on either side. Measure the distance between these lines, minus the thickness of the two wall panels.
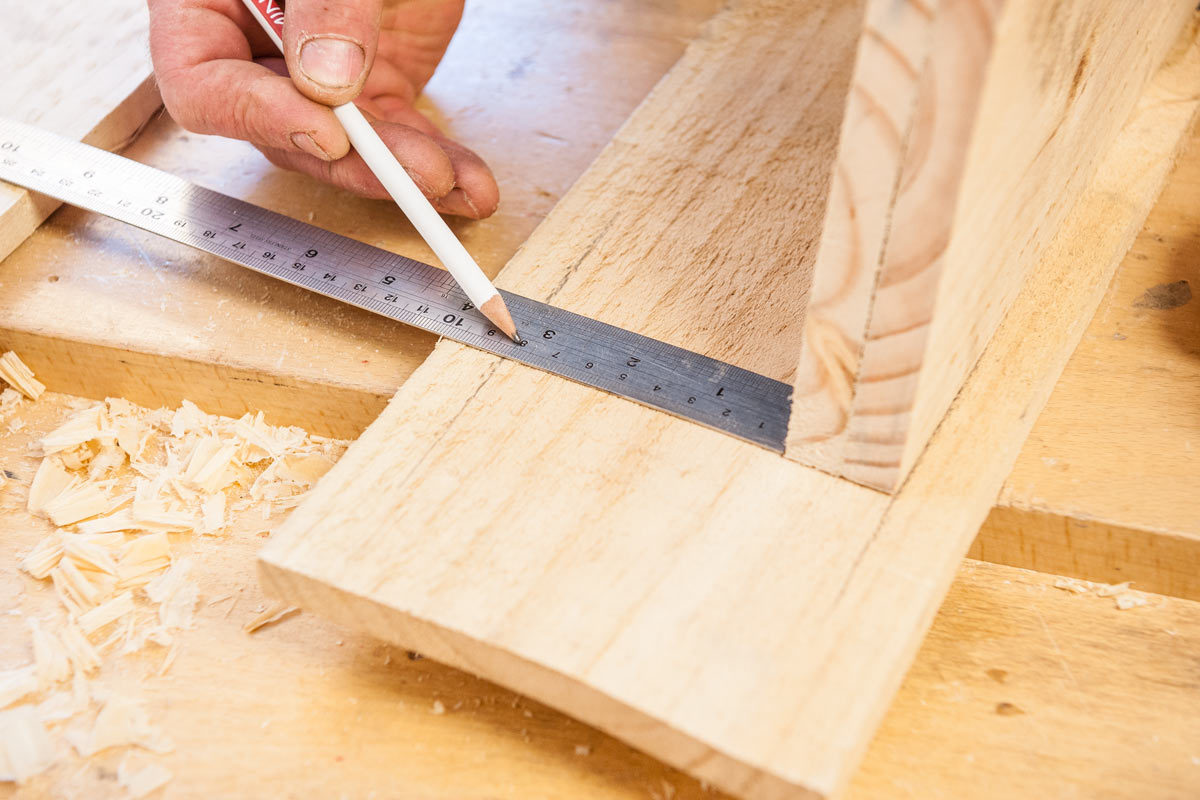
Step 7
Transfer this measurement to a marking gauge, this measurement will be the width of the central dividers.
Plane up one edge of the board to make these central dividers, ensure it is square and straight. Working off this edge use the marking gauge to scribe a line down the length of the board on both sides.
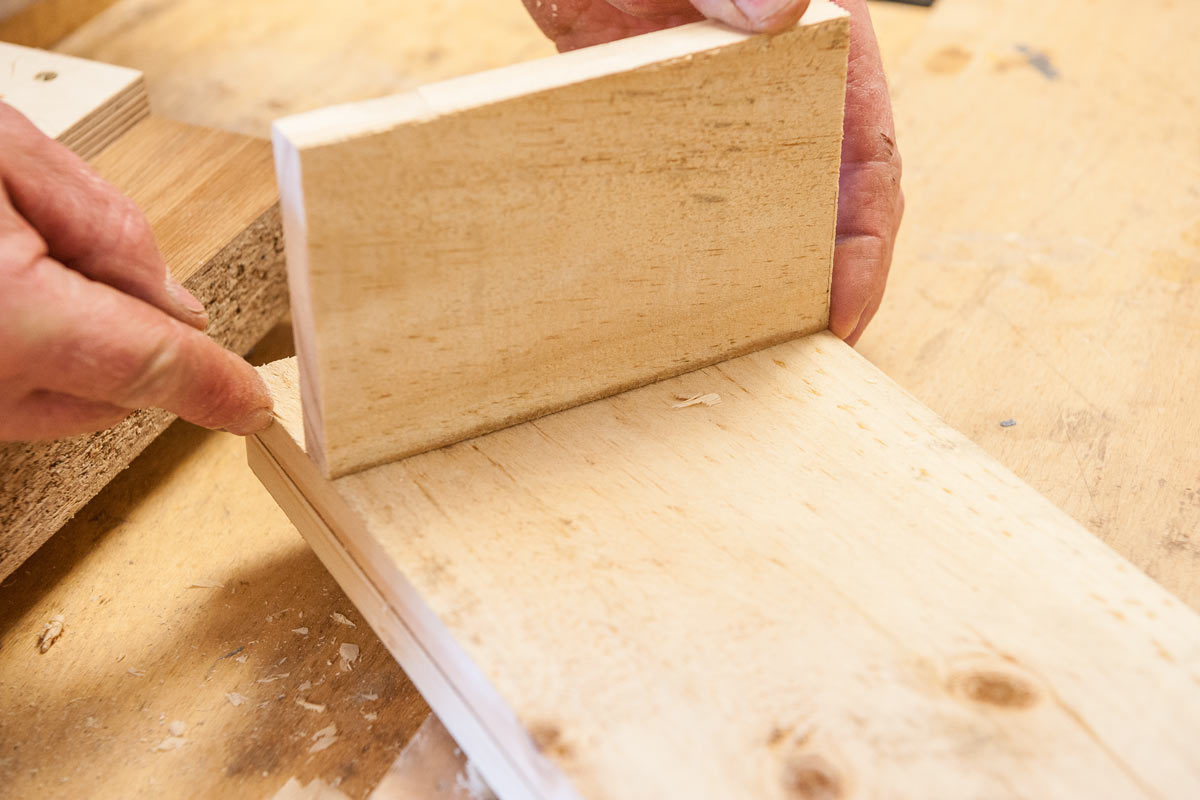
Using a rip saw cut off the waste material (tip: cut on the waste side of the line). This being the board to make all the central divider sections.
Carefully plane down to the scribe lines, ensure the board is square and straight (the scribe lines will be the best guide of this).


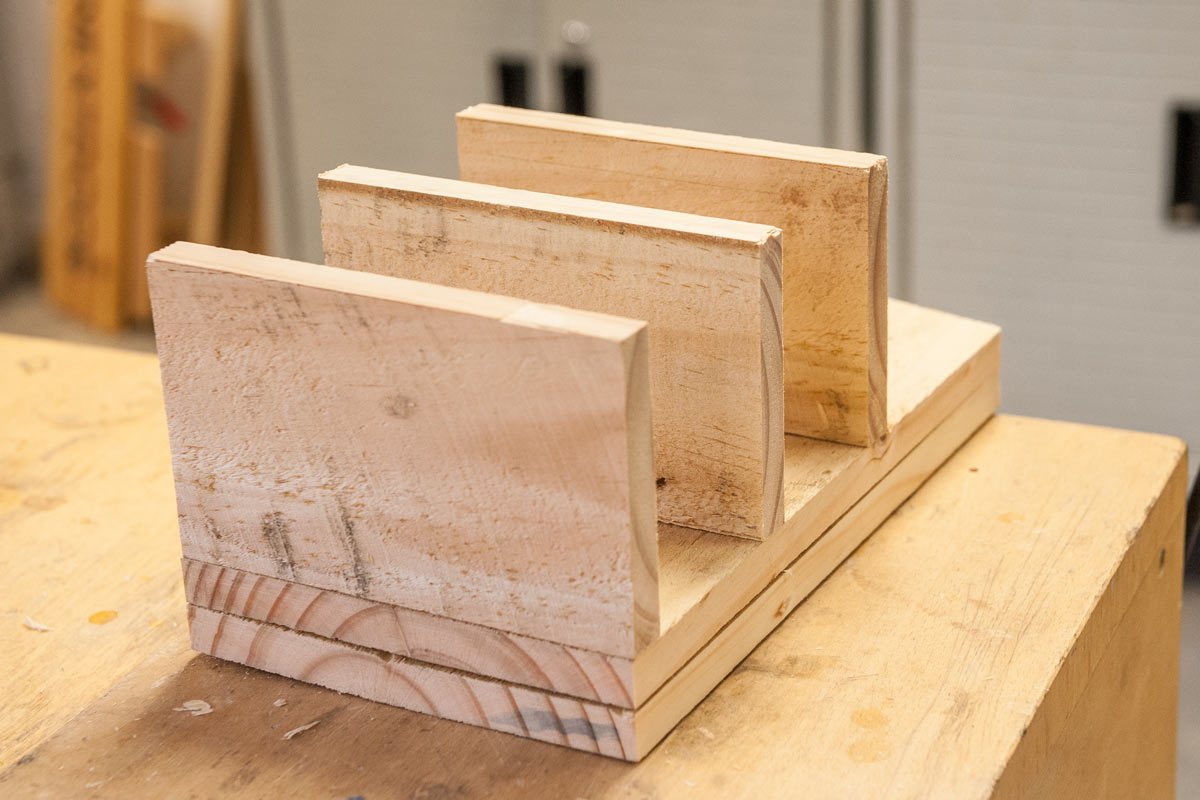
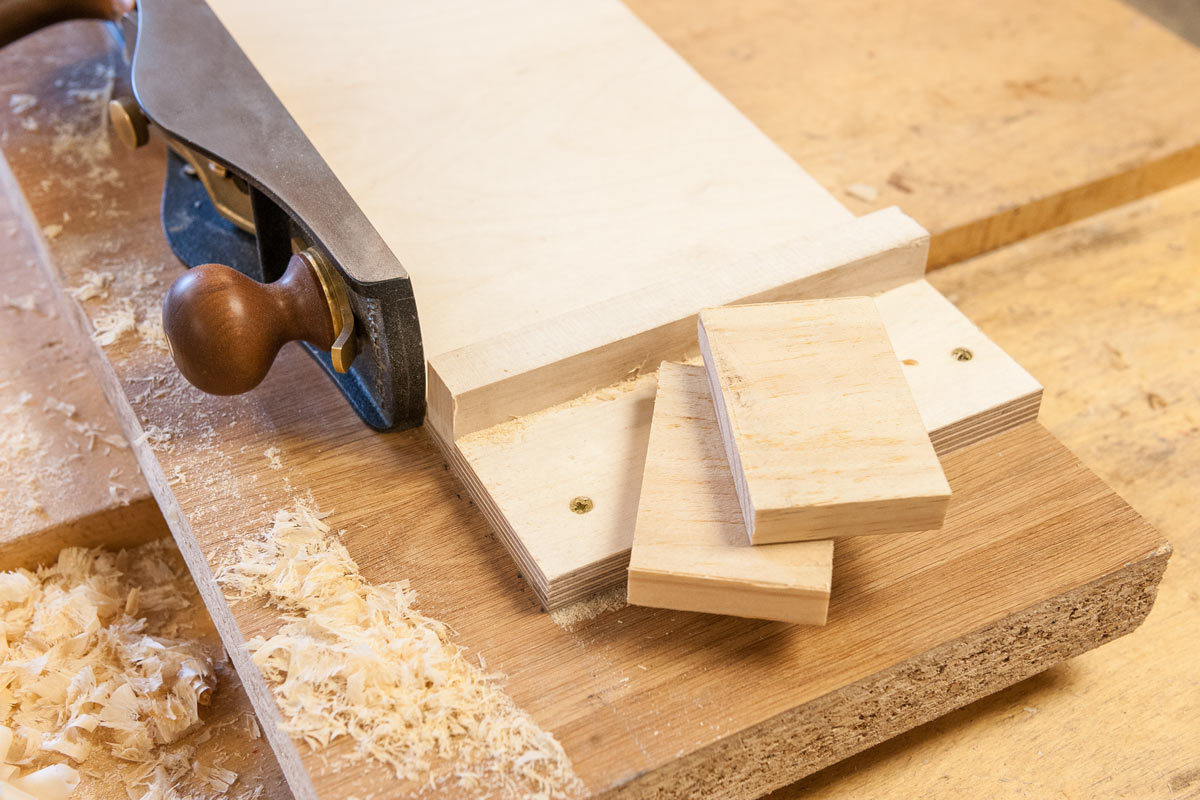
Step 8
Using the shooting board square one end.
Step 9
Measure, mark and cut these central dividers to the width of the side panels. As many as you desire, we have made three.
Making The Access Panel (the first floor of the Bee and Bug Hotel)
Step 10
Arrange the dividers in the desired position and measure the distance between them. Using the shooting board, square up one end of the divider panel. Set up a marking gauge to the length as measured. Mark out and cut this off. Clean up the saw cut using the shooting board.
Step 11
Repeat this again so that you have two bits the same.
Lay these out between the central dividers (on the side panel) and make sure they fit.
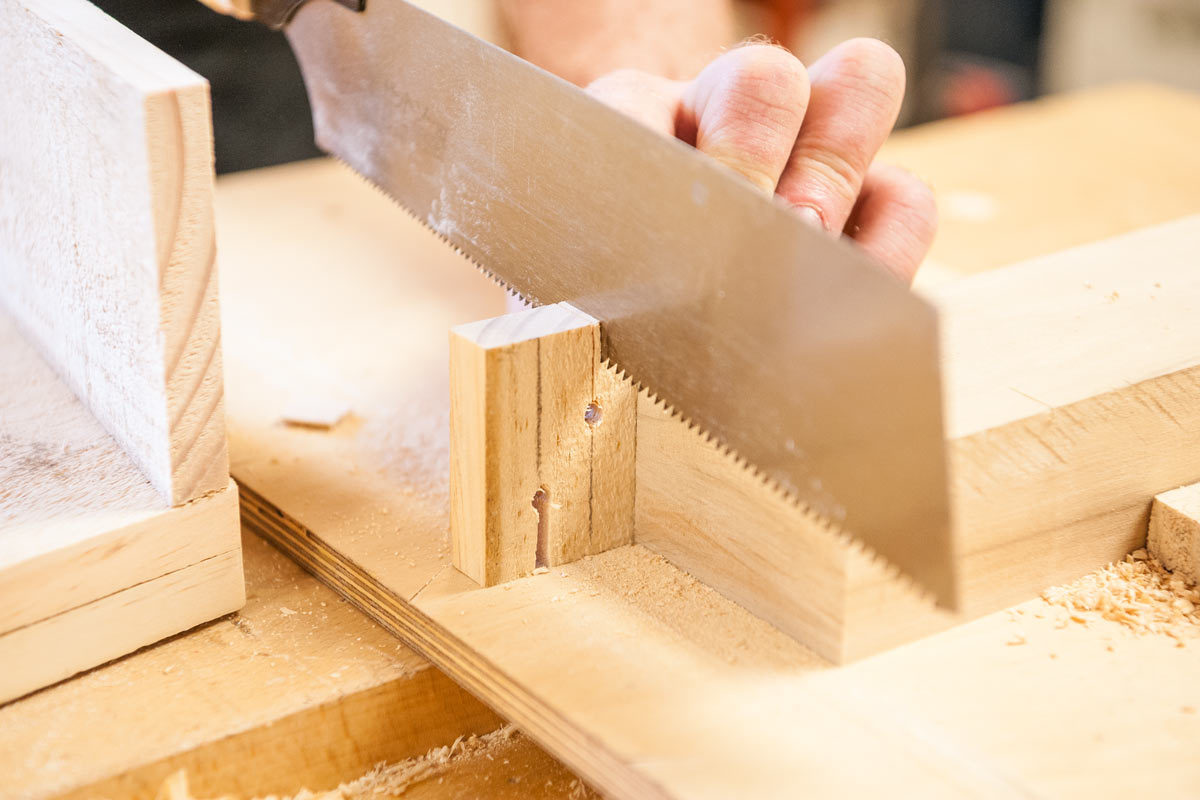
Step 12
Now drill holes into the front of the panel using a cordless drill (4-6mm). These holes are the access points for your bug guests. Using a hand saw, carefully cut down the grain removing a small section.
Attaching The Access Panel to The Central Dividers
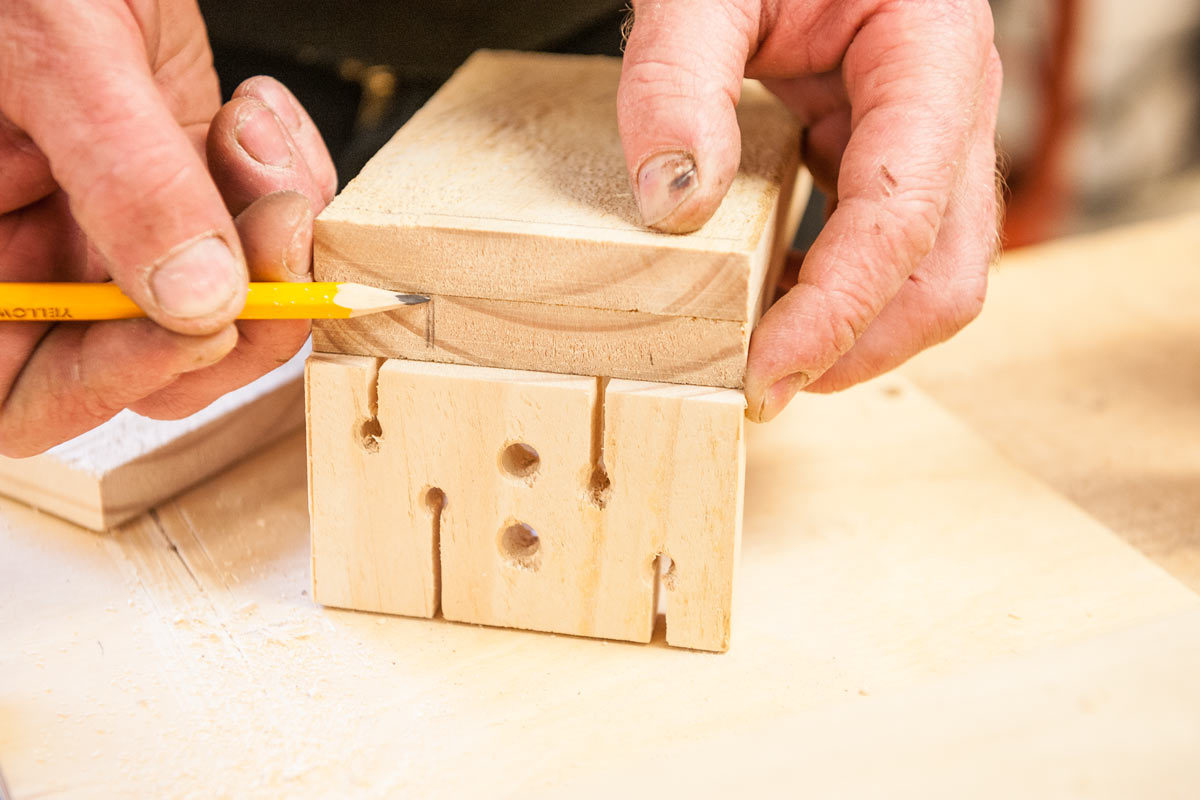
Step 13
Check the position of where the screws can be located so that they don’t hit the saw slots you’ve just made (using the drill and hand saw).
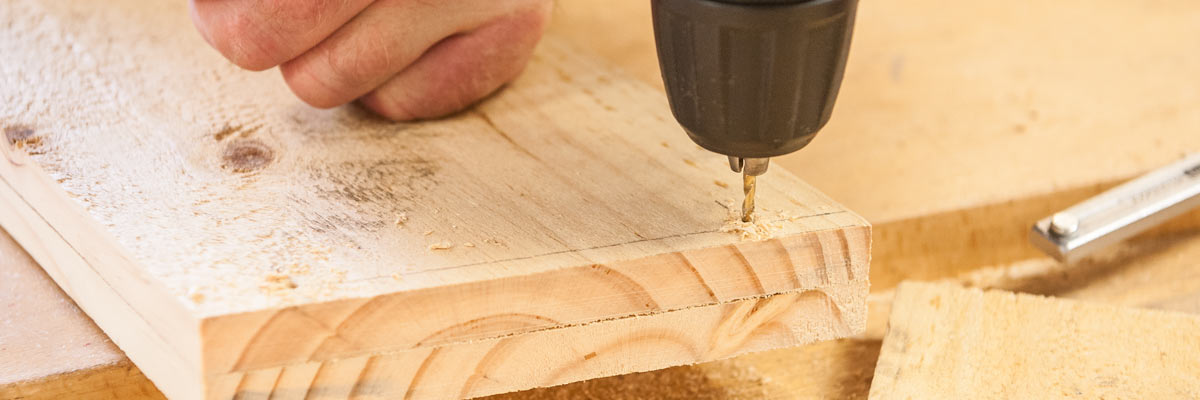
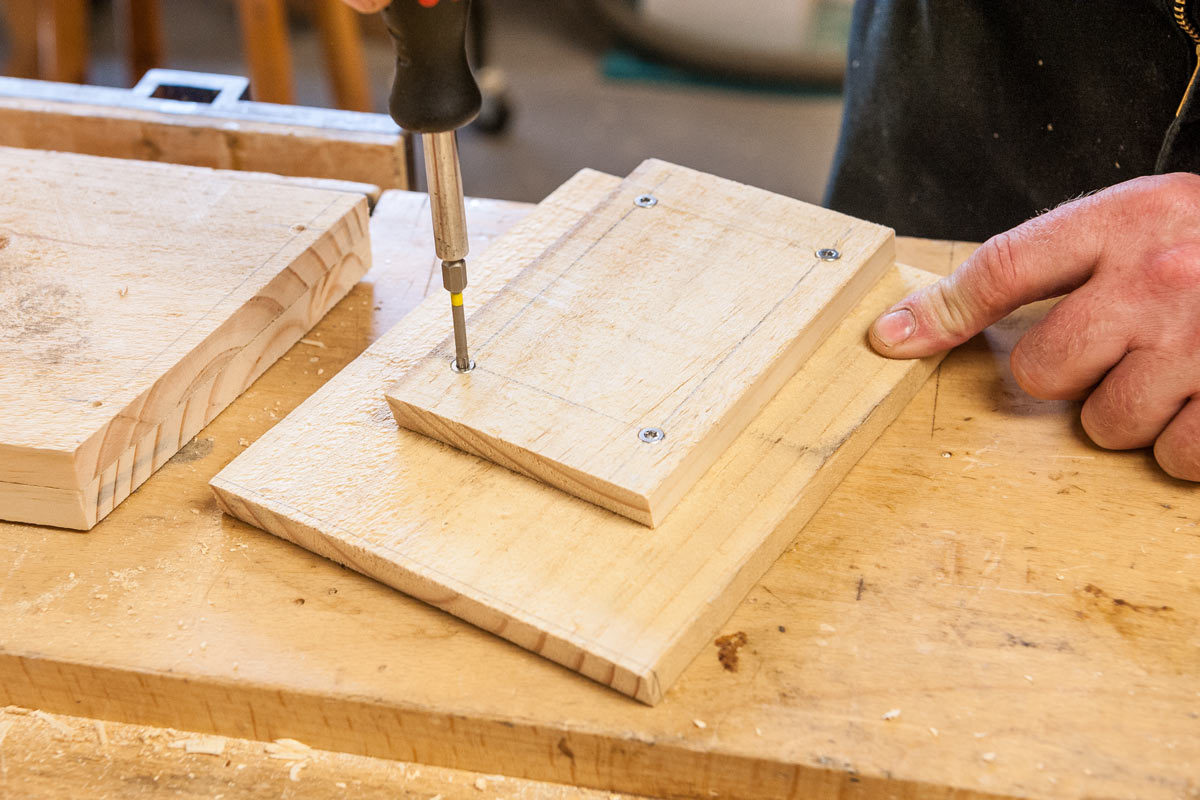
Step 14
Clamp the two central dividers together so that they can be drilled at the same time and in the same position. Drill a 4mm hole all the way through the two boards. Make sure the drill holes enter the access panel centrally so that the screw does not protrude.
Using a clamp to hold the pieces together, screw the boards together using stainless steel screws. Your first floor (central section) should now be assembled.


Making The Top Divider
Step 15
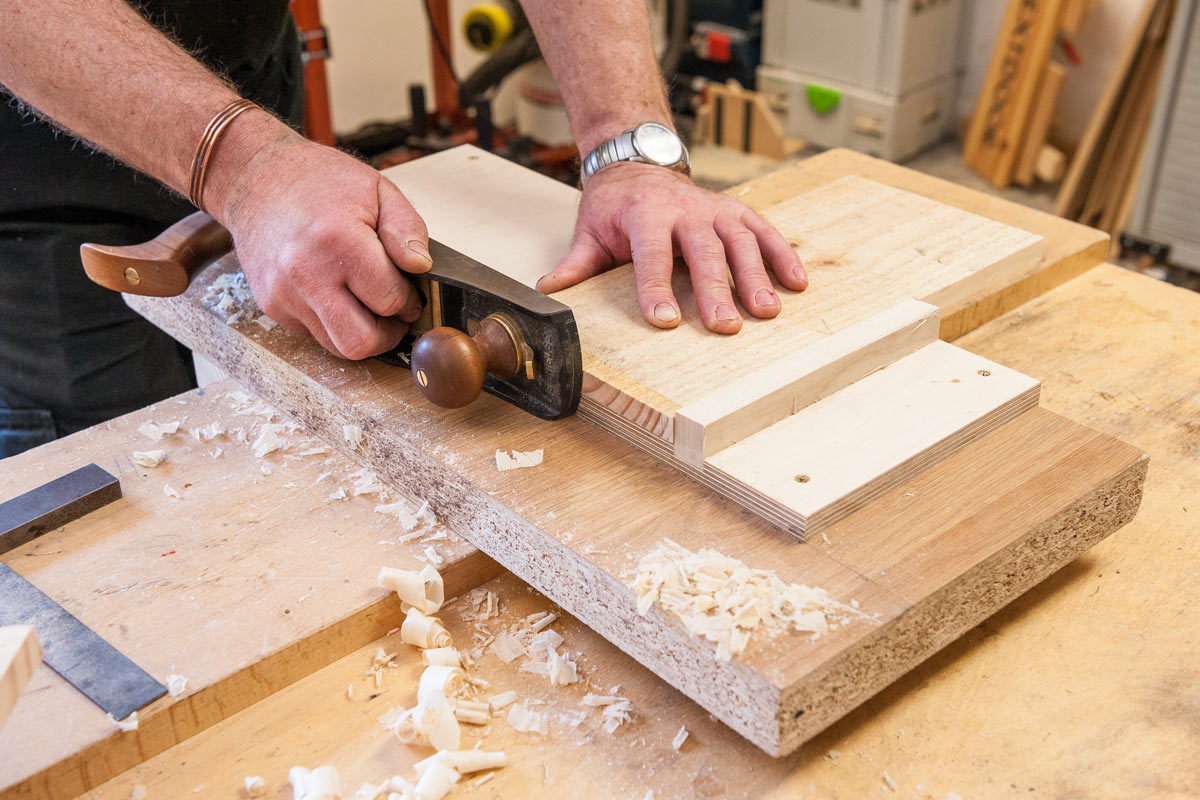
Decide on the pitch of your roof and cut two plywood wedges to match the angle of the pitch. Using these wedges on the edge of the shooting board will allow the board to be planed square thereby matching the angle of the roof pitch. This is the front edge of the divider.
Position it on the side panel and mark to length, cut off the waste and then trim back using the wedges and the shooting board thereby matching the angle of the roof pitch. This is the back edge of the divider.
Step 16
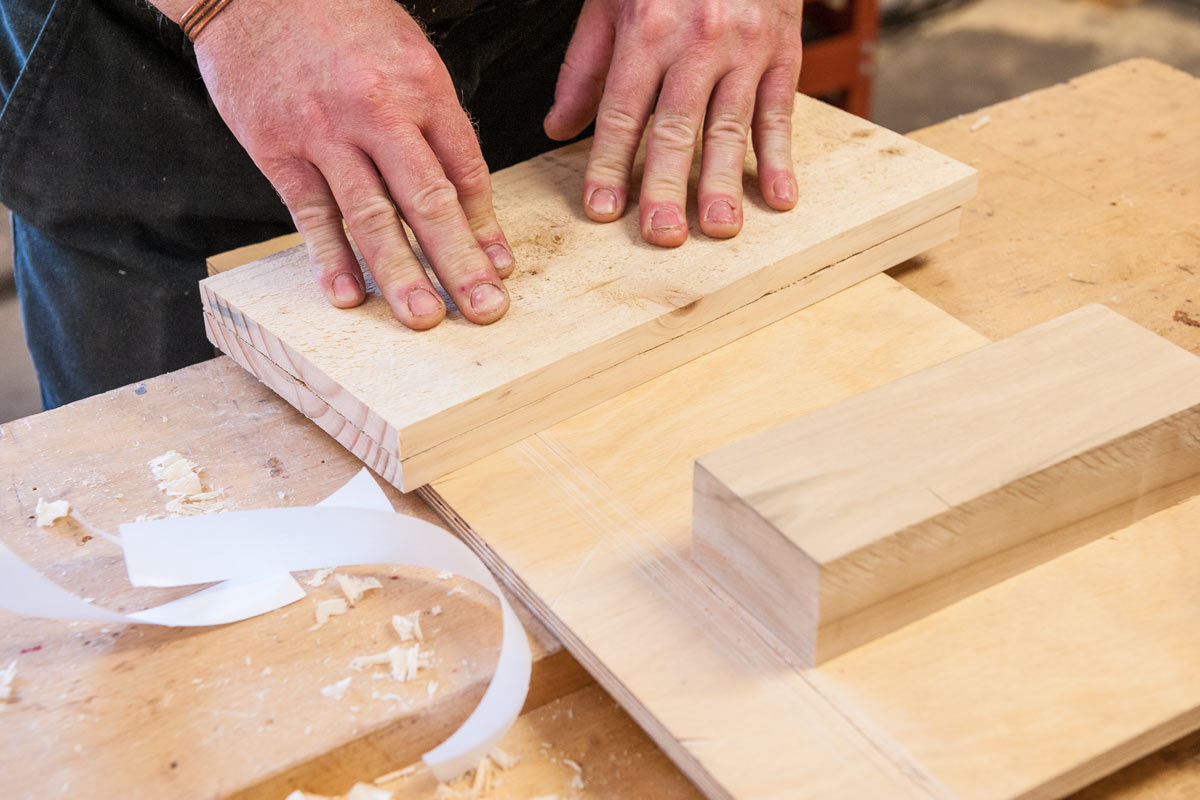
Lay out the components and check all fits together squarely.
The Roof
Step 17
The roof board has the same angle on the front and back as the top divider, so repeat the previous step on your roof panel.
Construction Of The Bee and Bug Hotel
Step 18
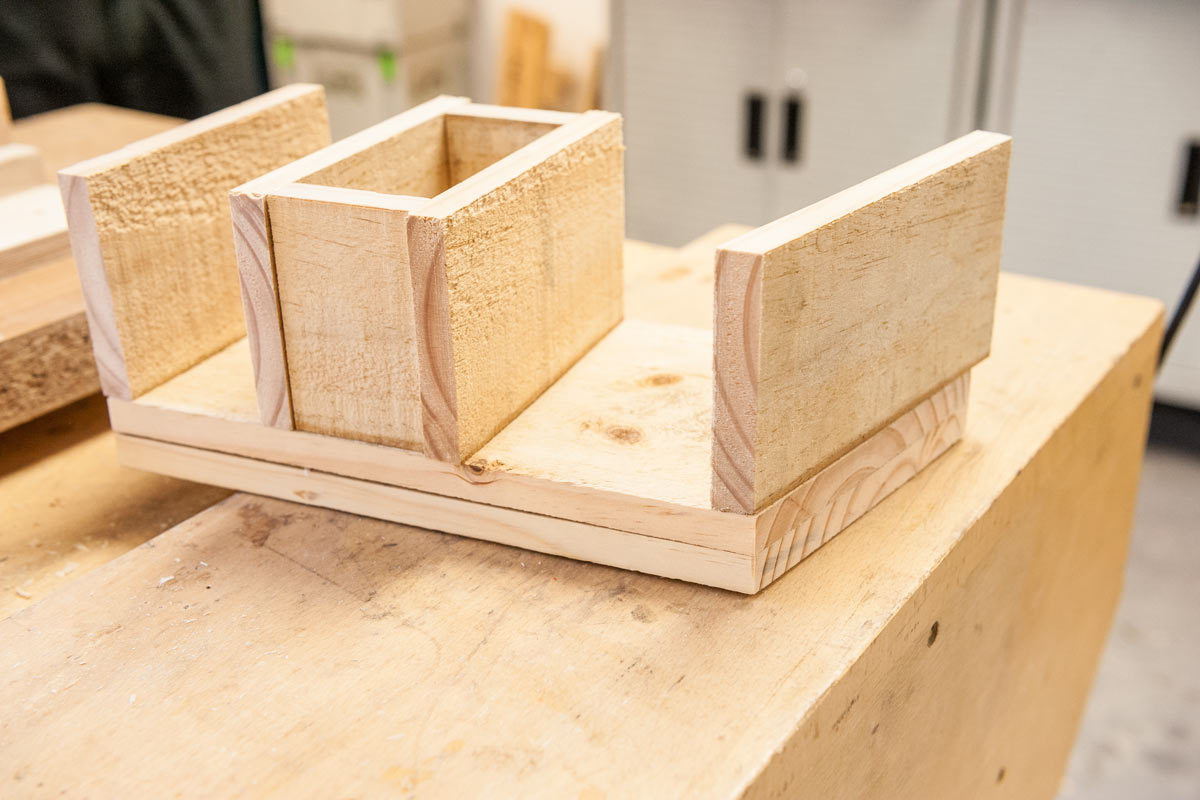
Now we will assemble the hotel using the central box (first floor).
Measure and mark out the position of the screw holes on the top and bottom of the side panels so that we can attach the bottom divider (ground floor). Drill a 4mm hole in each mark but do not fix together. Having drilled all the fixing holes it is now possible to separate the two sides and remove the tape.
Step 19
Position the central box and mark out and drill holes.

Step 20
Position the top divider and roof together, making sure the back edges are flush. Mark out four fixing points, drill and fix this in place.
Step 21
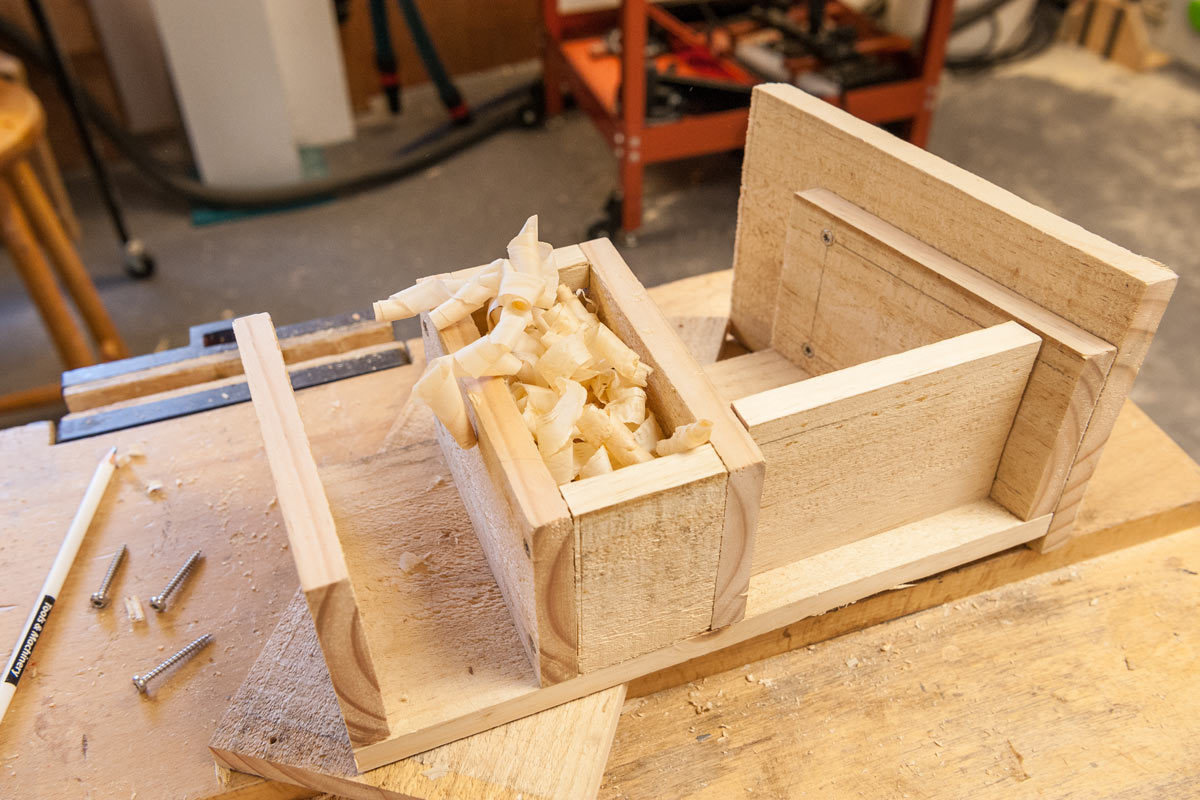
Attach only one of the side panels onto the roof section using stainless steel screws. We have used pan headed screws as these will give a better fixing without pulling into the soft wood.
Position the central box (first floor), hold in place with a clamp and screw together.
Screw on the bottom divider.
Step 22
Now it's time to start making up those luxury beds for your guests.
Fill the sections with whatever you can find on the garden floor. We’ve used bamboo in the top, bark in the base and wood shavings in the middle section.
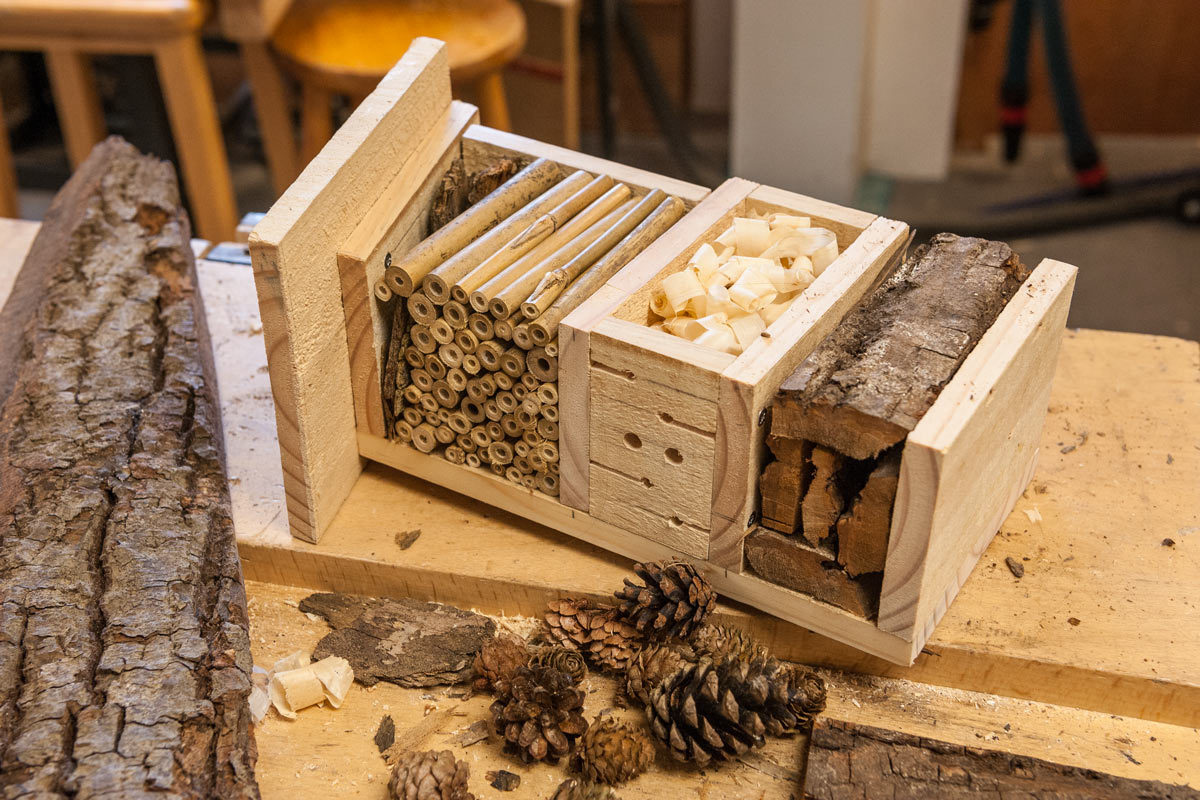
Step 23
Fix on the remaining side panel
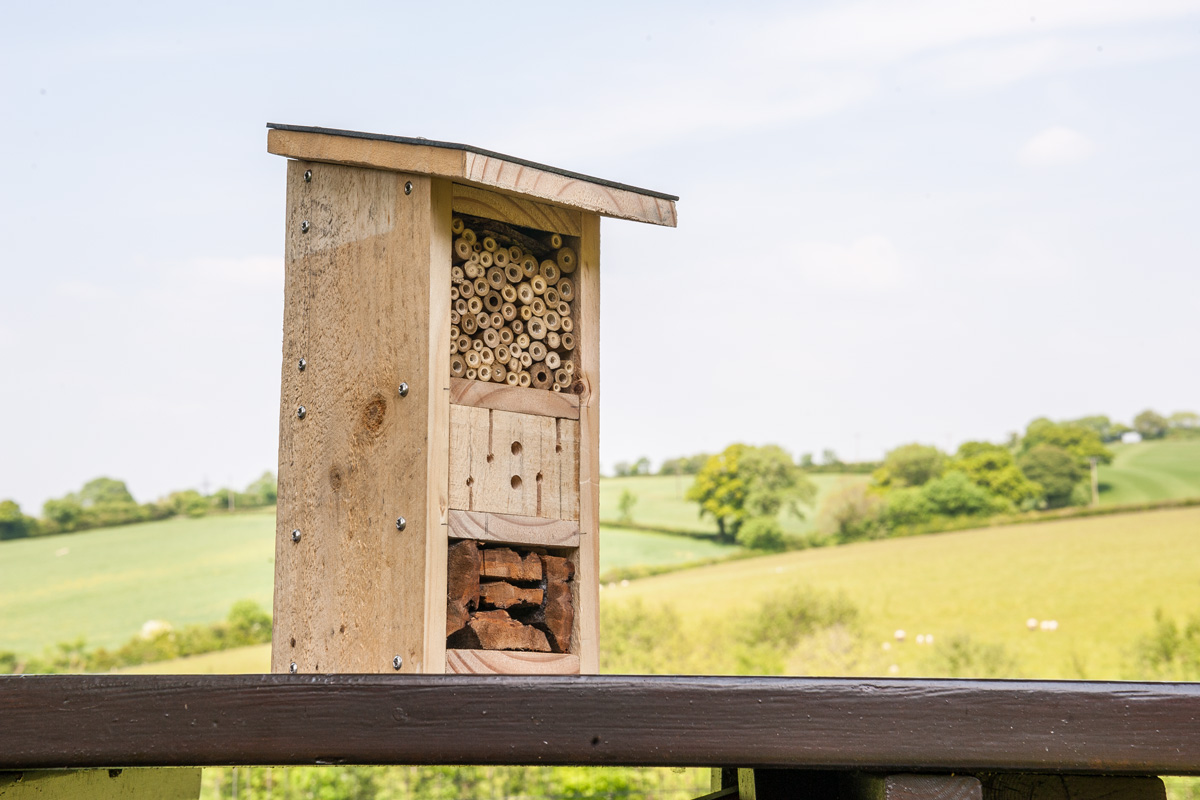
We have covered the roof with a slate composite tile, held by four screws.
Your bee and bug hotel is complete.
Hi Hanna
Your how to builds are great but could you do it in a format that can be printed to make it easy, I do not have a computer in my shed.
Many thanks Chris
It would be helpful to have a set of plans, as this could help budding woodworkers, when I went to secondary school in the 1970’s the first thing we had to do was to copy the drawing on the blackboard which had the dimensions and make a cut list and to draw an isometric drawing showing what it would look like. This was all done in our Technical Drawing session.