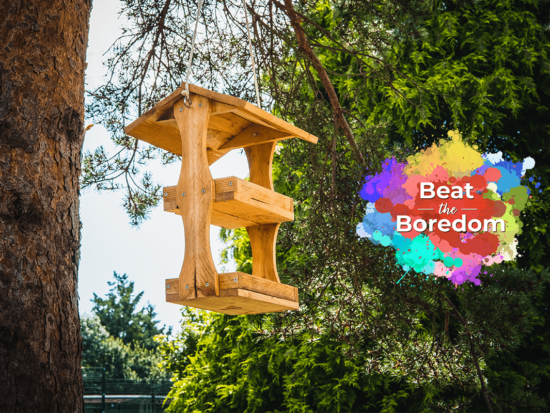
How To Make A Birdhouse
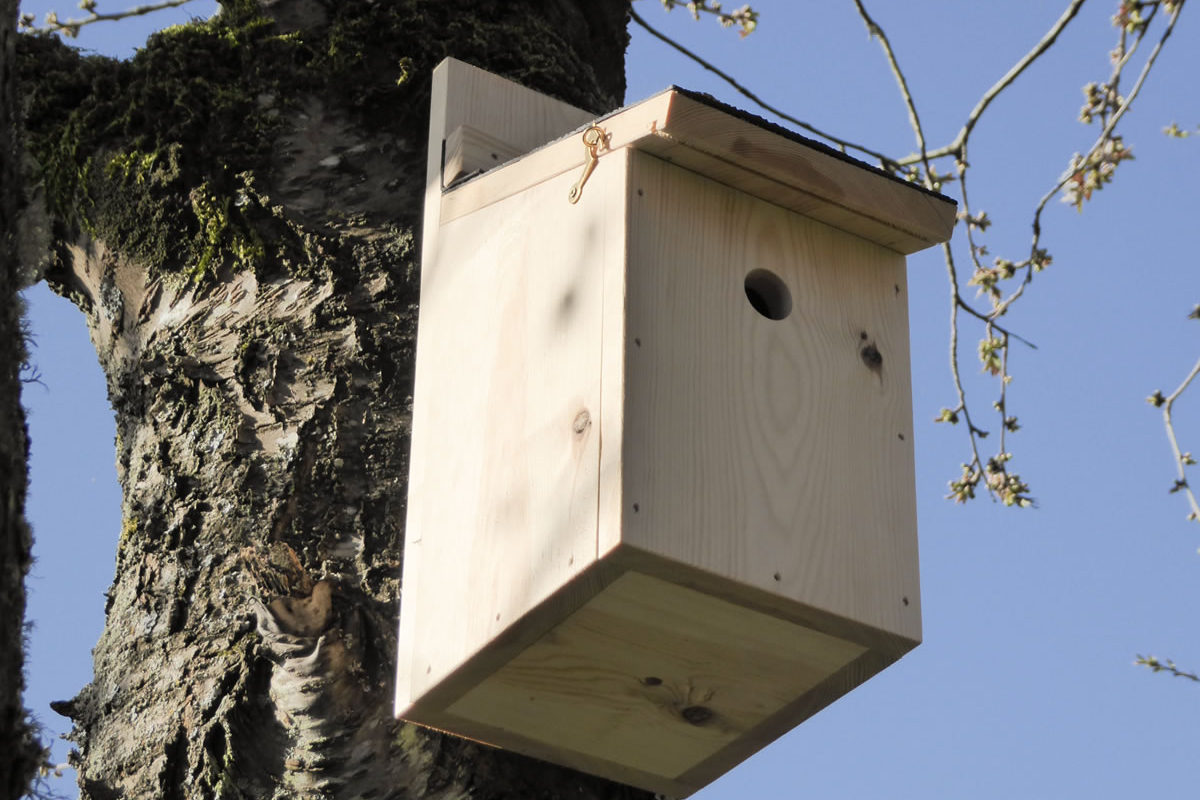
Making a birdhouse (or "bird box") for the garden is a great way to start a woodworking hobby, where you can continue to enjoy the benefit post build! It’s the perfect way to get children interested in woodworking and nature, and can be made by children, under constant adult supervision.
Download and print an RSPB approved A4 plan sheet here.
We have made the small size birdhouse with a 25mm hole, suitable for Coal, Marsh and Blue Tits. Par (planed all round) pine is used in the construction, 16mm thick.
No preservative used to finish, but an option would be to treat it with a water based preservative.
Tool Menu:
- Hand saw
- Ruler
- Drill
- Drill bit set
- Forstner bit
- Bar clamp/spreader
- Rider No. 9 1/2 Standard Block Plane
- Pencil
- A4 Stainless steel wood screws
Also needed:
- Small latch
- Wood
- Roofing felt (slightly bigger than roof section)
- Small amount of waterproof material, rubber/leather
- Galvanised felt tacks
Optional:
- 5mm plastic gardening meshing
- Stainless steel 30mm ring nails (if not using screws)
Making the Birdhouse- A Step by Step Guide
Step 1
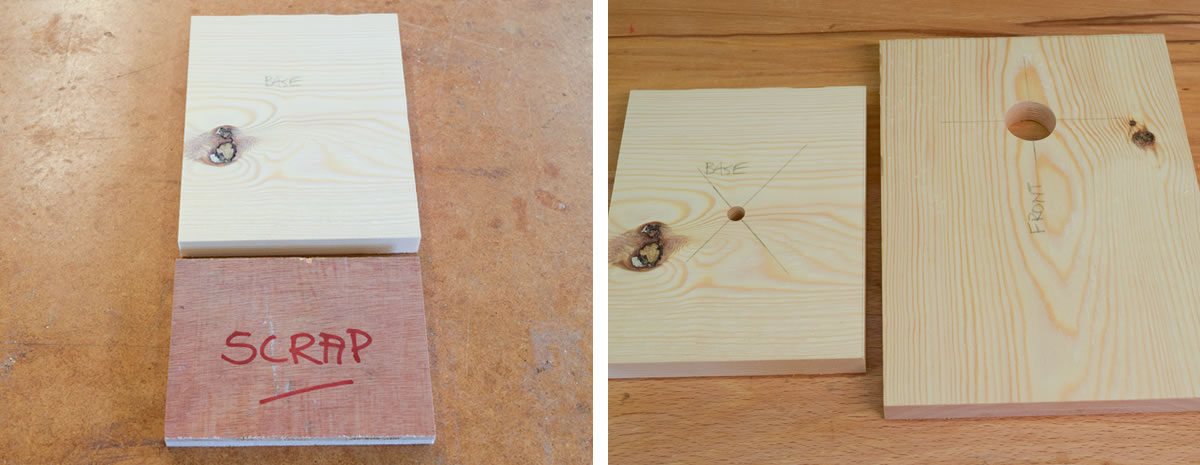
Prepare material to size as indicated on plan sheet. Use the smallest dimension on the left hand side (for a larger bird box, use dimensions on the right). Label all sides accordingly.
Step 2
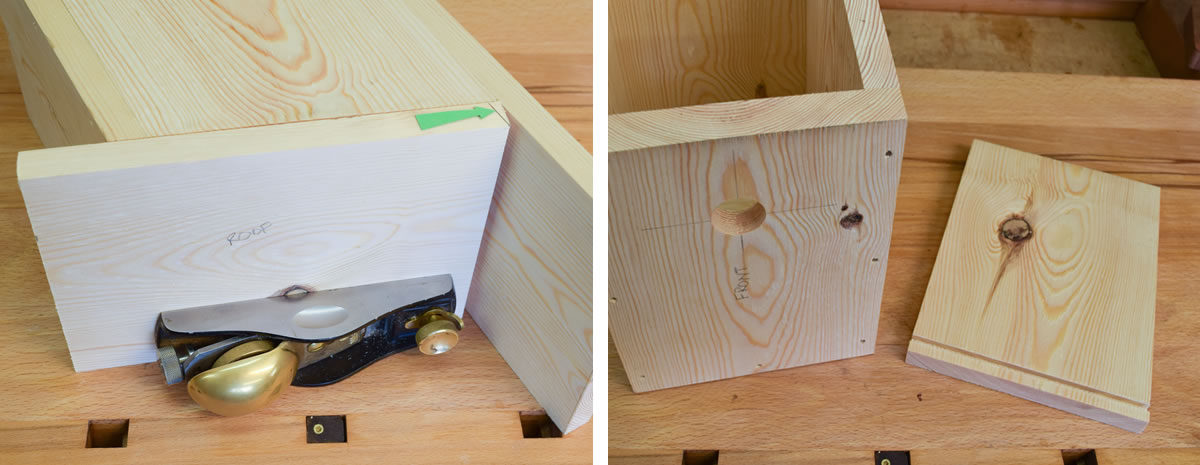
Take the two side sections; measure the smaller measurement on one side and mark out the slope to the taller side. Cut the marked slope and plane smooth.

Step 3
Prepare a piece of scrap material the same width as the base and put aside.
Step 4
Take the base section; using each corner mark diagonals across and drill an 8mm drainage hole in the middle. Taking the front section, measure 145mm from the bottom of the front for a 25mm hole centre. Drill a 25mm hole.
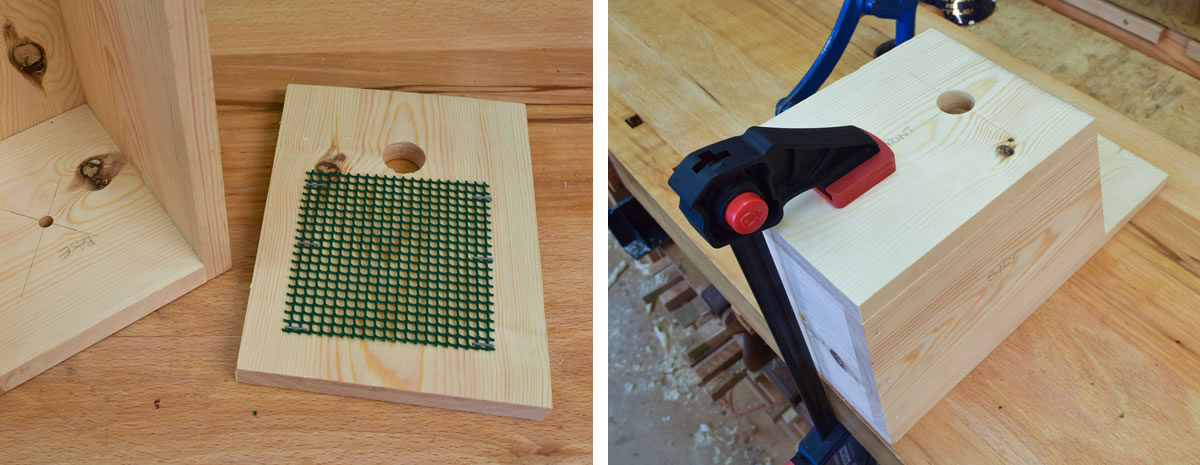
Step 5
Assemble and clamp together the two sides and base, with the base placed on the inside.
Top Tip! Place the piece of scrap wood into the middle to aid squareness.
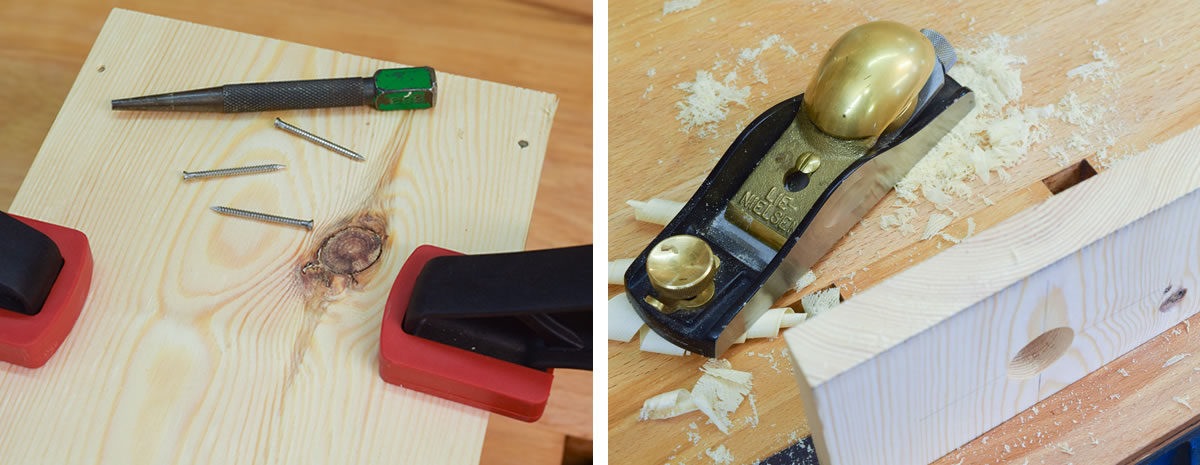
Step 6
Screw or nail down the base into the side pieces, just under the timber’s surface.

Step 7
Re-arrange the clamps to gain access to the back, screw or nail down to secure the sides.
Step 8
The front section fits on to the outside of the bird box. Therefore the top of the front needs to be bevelled at the same slope as the sides. Use the already fixed box to mark out the slope to get an exact fit.
Step 9
To improve purchase for young chicks leaving the nest you can add 5mm plastic meshing stapled to the inside of the front (approved by the RSPB). Alternatively you can roughen the inside face under the hole with a file or saw blade.
Step 10
Fit the front section to the birdhouse and clamp to the bench, screw or nail the front into the side sections (as step 6).
Step 11
The roof will need a bevel to avoid any leaking; using the roof matched to the box as a guide, mark out the bevel on roof (arrowed) and plane off waste.
OPTIONAL: For extra drainage you can route a 5mm drip channel on the underside of lid.
Step 12
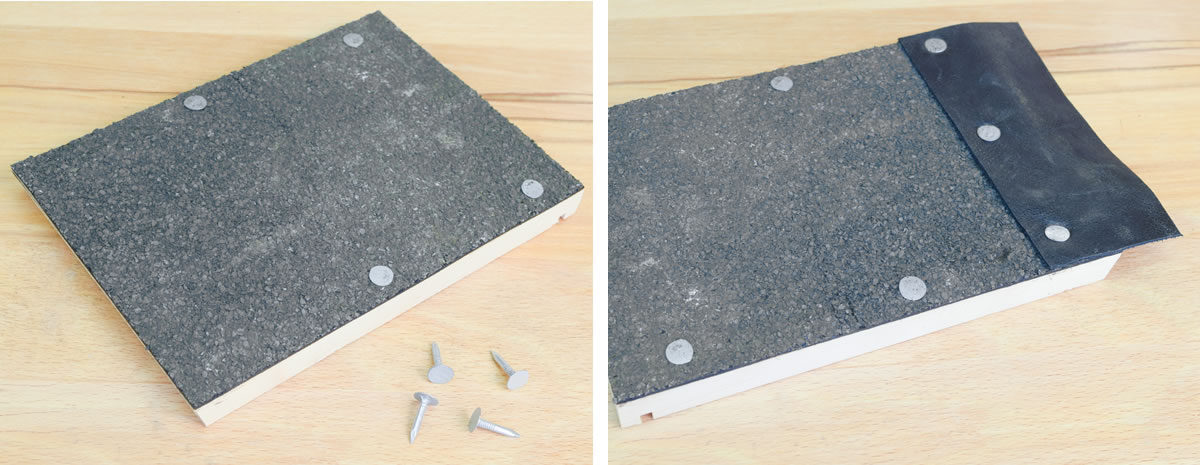
Using the galvanised felt tacks, tack the roofing felt to the front and middle of lid; trim to size after.
Step 13
Make a flexible hinge with the piece of leather or rubber by tacking the leather to the back of the roof piece allowing for a generous overlap at the end of lid.
Step 14
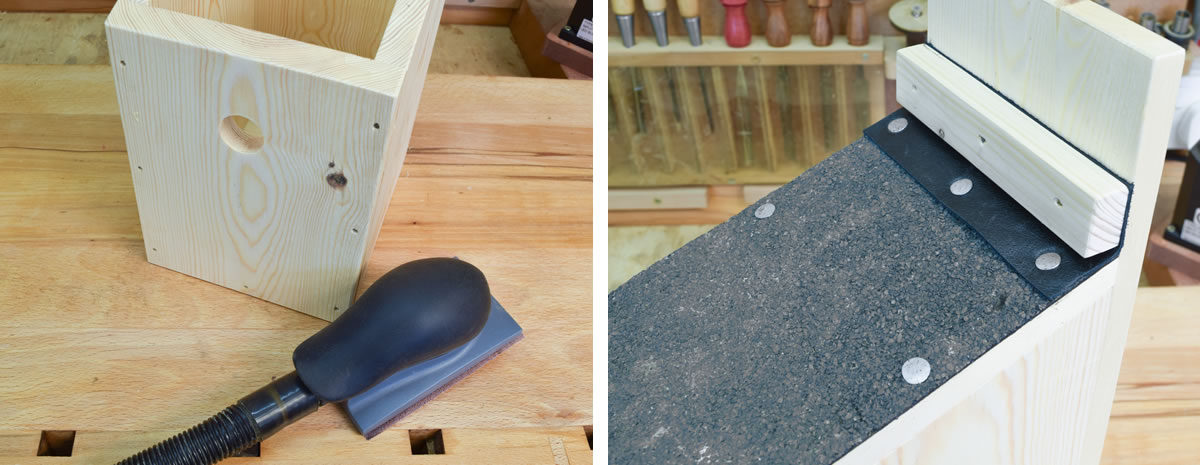
Sand off all pencil marks and sharp corners.
Step 15
Make a small additional block the same width as the back section and roughly 25mm high x 20mm deep. (The small block forms a sharp pivot point and prevents the lid slipping down). Screw or nail the lid onto the back section, through the small block and the overlapped piece of leather.
Step 16
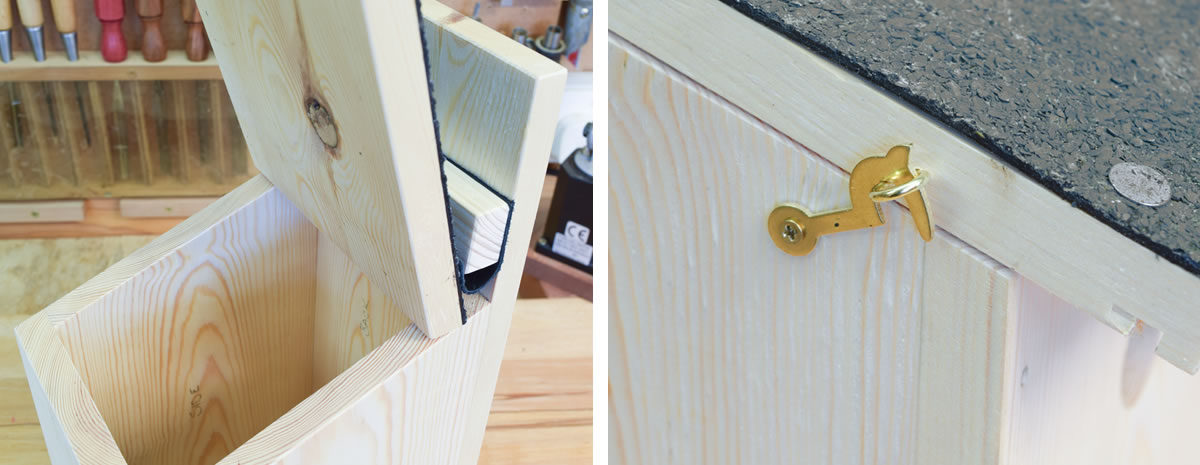
Lid will still open to allow access for cleaning.
Step 17
Fit small brass catch.
Step 18
Drill a fixing hole in the back and screw to the tree or wall.
Discover more…
Looking for more woodworking projects? Take a look at our Winter-proofing Guide for ideas on how to winter proof your outside spaces. Alternatively, why not take a look at our informative guide on How To Build a Small Garden Shed, perfect for storing your essential garden tools. Follow our 28 step guide to learn the processes involved.
Get in touch!
If you've made a birdhouse using our step by step guide, we’d love to hear from you. Comment below or send us a photograph and tell us all about what you’ve been up to and how you got on. Alternatively, get in touch via our social media platforms. Find us on Facebook or send us a tweet using #birdhouse to @AxminsterTools.