How To Make a Child's Cart & Bricks
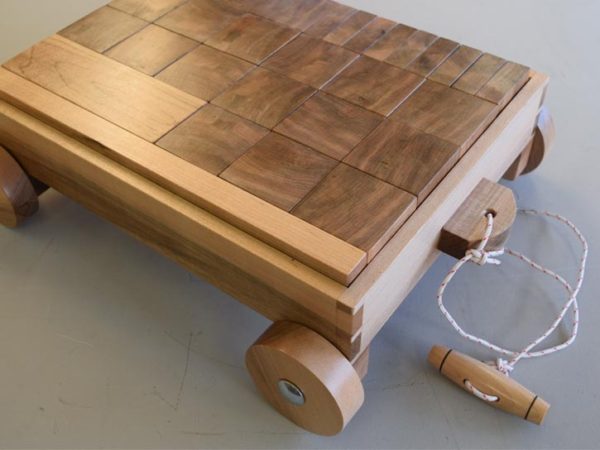
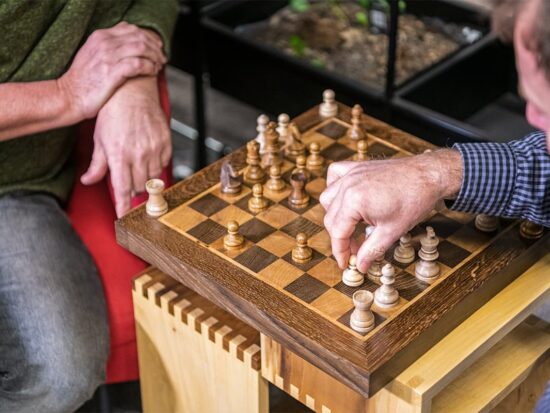
A traditional wooden child's cart and bricks are always a pleasure to make. Enjoyed by all children; they’re robust, tactile and fun to play with!
Any combination of blocks could be used as long as they all fit comfortably within the cart. Size of the cart can be increased or decreased accordingly.
We turned the handle toggle and the wheels but we have listed alternates if you do not have access to a woodturning lathe. If you’re not turning the Toggle you can use dowelling. Pre-made wheels can be bought at good hobby shops if woodturning is not an option.

Wood & measurements:
Close grained timber is ideal; we used Canadian maple, but beech, American cherry etc are excellent for toy making.
Child's Cart:
2 X lengths of Canadian Maple @ 353mm long X 55mm deep X 10mm wide
2 X lengths of Canadian Maple @ 265mm long X 55mm deep X 10mm wide
Wheel Blanks: Canadian Maple to size down to 75mm diameter.
Wheel Brackets X 4 - 60 X 30mm
Toggle/handle blank: Canadian Maple to size down to 80mm long.
Base 12mm plywood to fit within cart base rebate
Small block of wood for towing bracket, 60mm.
Blocks:
17 @ 55 x 55 x 55 mm
9 @ 55 x 55 x 18 mm
1 @ 332 x 55 x 20 mm
1 @ 165 x 55 x 55 mm
The Cart Frame
1. Choose and prepare a suitable material to size. Close grained timber is ideal, Canadian maple is used here, but beech, American cherry etc are all excellent for toys. Use bandsaw, circular saw, planer / thicknesser.
2. Mark out and cut dovetails on corners
3. Clean up internal surfaces
4. Glue sides together, clean up glue 'squeeze out' with damp brush
5. Check diagonals
6. Flush dovetail joints
7. Level top, check for straightness and 'twist'


The Cart Base
8. Rout out base rebate for 12mm plywood
9. Square out the corners
10. Fit 12mm plywood base ‘dot to dot’
11. Sand base
12. Apply glue to base rebate
13. Glue and pin base, punch pin heads under the surface
14. Clean up glue ‘squeeze out’


Wheels
15. Select wheel blanks, mark centre, scribe circle
16. Bandsaw to rough circle shape
17. Drill centres 8mm
18. Make three small spacers, centres drilled 8mm. Make mandrel from 8mm studding, round over one end (arrowed)
19. Mount wheels on mandrel with 8mm nuts and large washers
20. Mount wheel mandrel on lathe, rounded end in inverse cone in tailstock
21. Turn wheels and sand
22. Disassemble mandrel, reassemble with spacers, mount into lathe
23. Sand wheel edges smooth


Cart Towing Bracket
24. Select small block for towing bracket, mark centre hole, drill 5mm
25. Mark out suitable curve
26. Cut to rough shape on bandsaw
27. Sand to shape, finish with hand sander
28. Countersink hole
29. Mark out clearance holes and drill
30. Transfer pilot hole positions on bracket
31. Drill bracket pilot holes to correct depth
32. Glue and screw towing bracket


Wheel Brackets
33. Prepare four identical blocks
34. Tape together to make two pairs, mark the axle hole centre
35. Drill 8mm, insert 8mm dry registration dowel
36. Remove tape on side ‘X’ on both sides, add further tape at 90° to cover holes
37. On each pair, sand one face flat, round off the corners on the other face
38. Remove tape and dowel to leave four identical brackets
39. Sand on flat sanding board
40. Glue in pairs on the underside of cart. Use 8mm studding to align axle positions


Bricks
41. Prepare material for blocks to size, sand one end
42. Cut block to size on bandsaw
43. Sand sawn end
44. Clean up faces
45. Sand on the sanding board
46. Relieve all sharp edges (arrowed) on cart and blocks with fine sandpaper
47. Blocks should be a comfortable fit in the cart


Finishing
48. Clean up and sand exterior sides on cart
49. Application of two thin coats of child friendly Osmo PolyX (satin)


Toggle
50. Prepare turning blank, drill two 4mm holes in centre
51. Mount in lathe between centres
52. Turn to diameter required
53. Mark centre in pencil and length of toggle equal distances either side of the centre line
54. Turn toggle to length on pencil line limits
55. Turn toggle to shape
56. Burn two decorative (optional) lines in the ends with copper wire, sand to finish
57. Part off completed toggle


Attaching the wheels
58. Obtain 75mm coach bolts, fit one to a wheel using 8mm nut/washer
59. Fit wheel to bracket, mark off correct length, to include a further washer and nyloc nut
60. Cut all remaining bolts to length (arrowed), file ends smooth
61. Fit all bolts to the wheels, assemble to brackets with nyloc nuts


Load the bricks and enjoy!