
How to make a Halving Joint
A halving joint is a useful woodworking joint best suited to frameworks; this joint joins two pieces of timber by cutting the full width of each part by half the depth and then overlapping.
It’s a simple joint but requires attention to detail as any imperfections can be seen. Using hand tools and the router table, this joint can be achieved.
Tools needed
- Router table
- Router ¼" Bosch green or DeWALT ½"
- Router cutter
- Steel rule
- Marking knife
- Pencil
- F clamp
- G clamp
- Square
- Chisel
- Mallet
- Marking gauge
- Bench hook
- Saw
Step 1
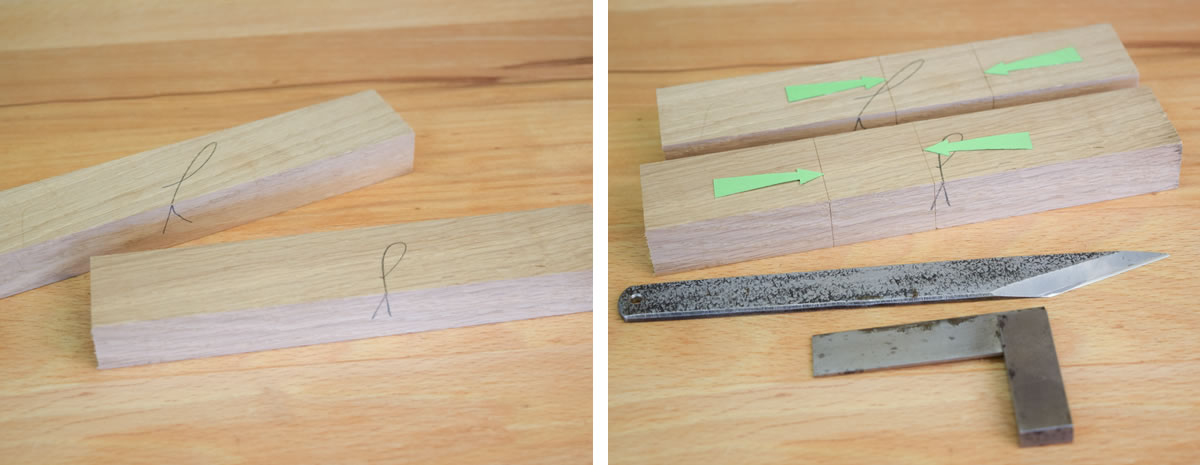
Prepare material to size, square or rectangular in section as required.
Step 2
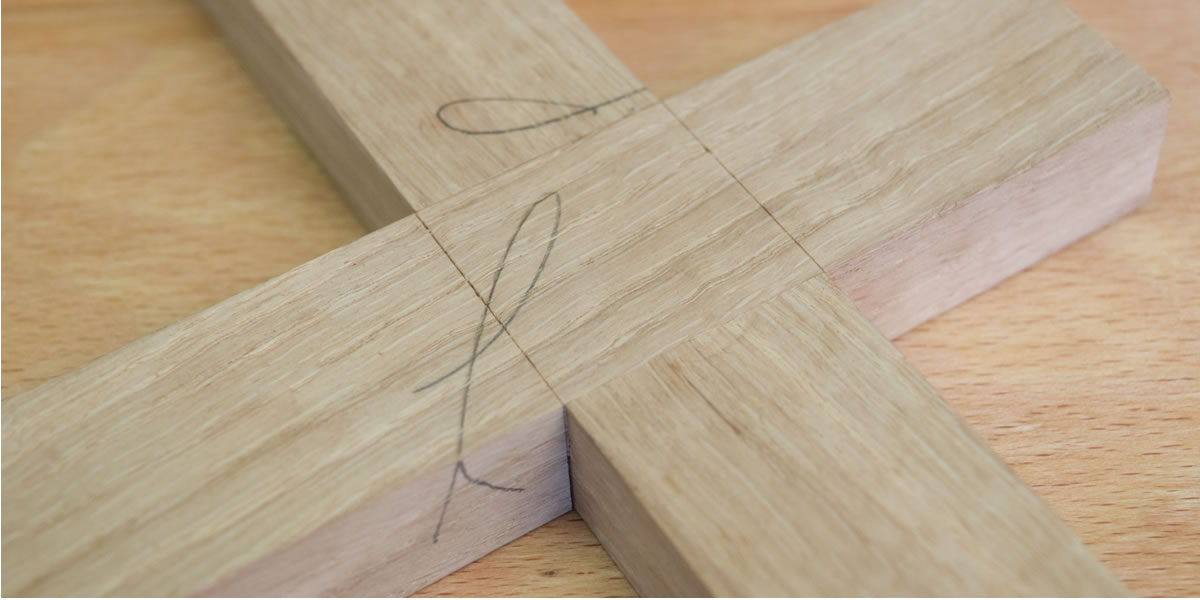
Make a pair of knife lines all the way round each piece. Distance between lines equal to the width of the wood, or slightly less (0.5mm) for a very tight fit.
Step 3
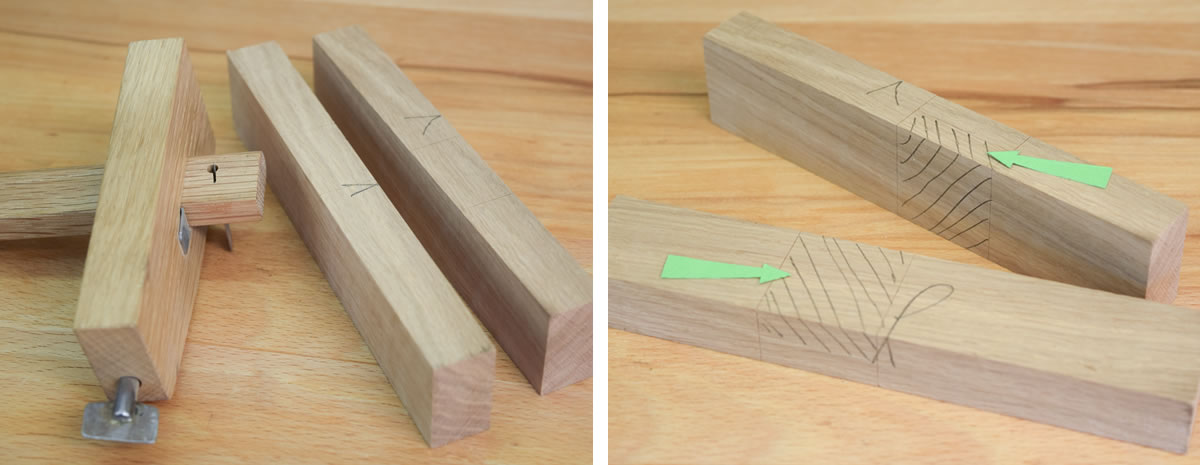
Set a marking gauge to half the thickness of the wood.
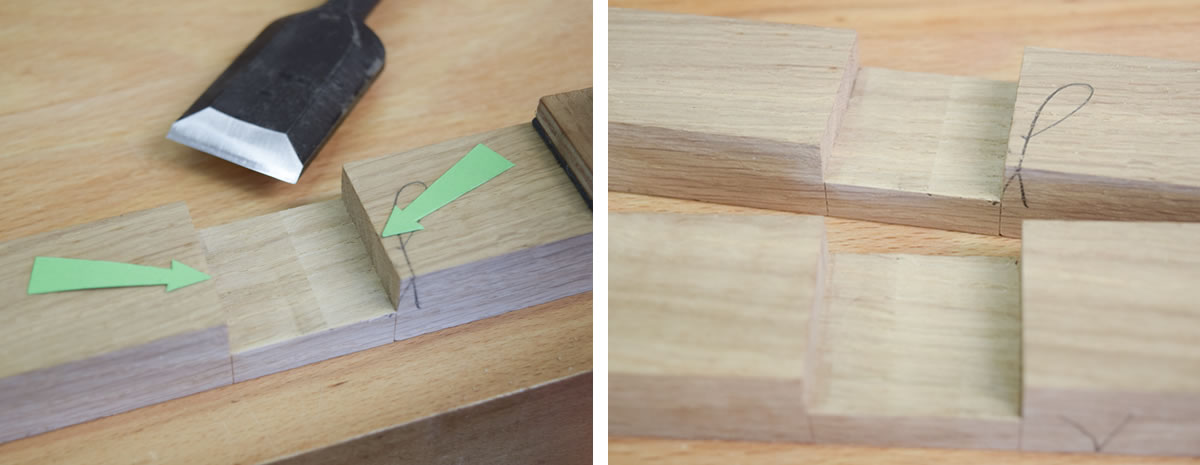
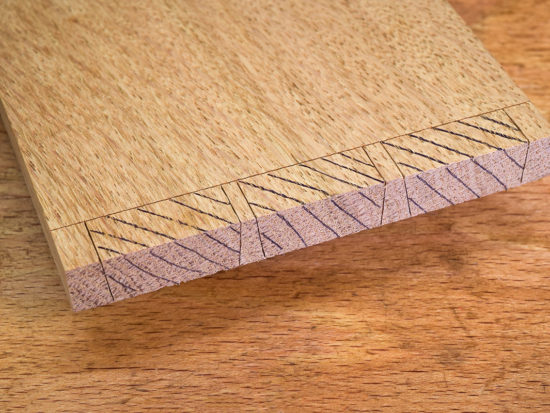
Step 4
Gauge a line along the edges between the knife lines on each piece. Mark the waste on alternate sides (arrowed).
Step 5
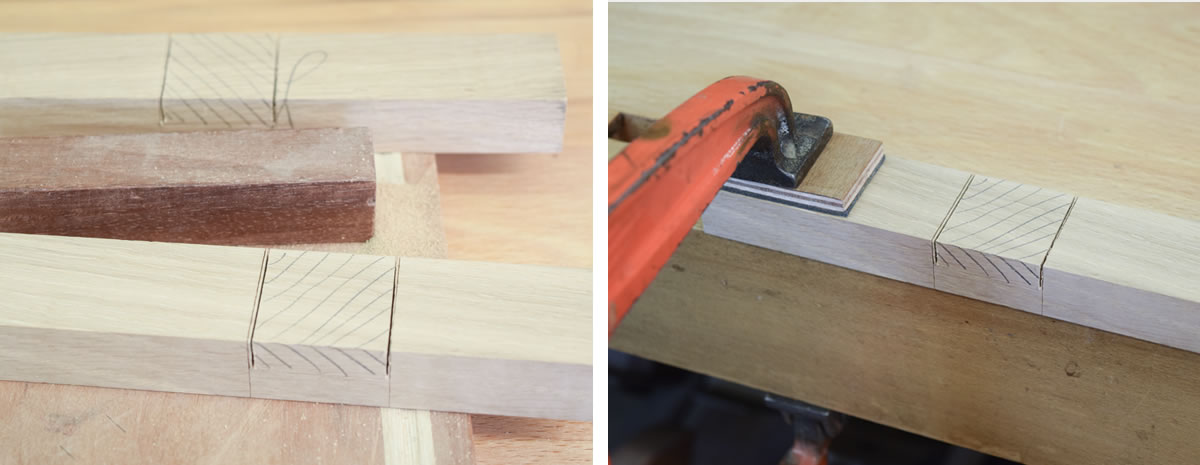
Reinforce initial knife line cuts on waste areas.
Step 6
Use bench hook to make saw cuts into waste, stopping at gauge lines. Saw cuts just inside the lines (see step 8) to allow sufficient material to finish exactly on the line with a chisel.

Step 7
Complete saw cuts.
Step 8
Clamp the work to the bench, supported at each end.
Step 9
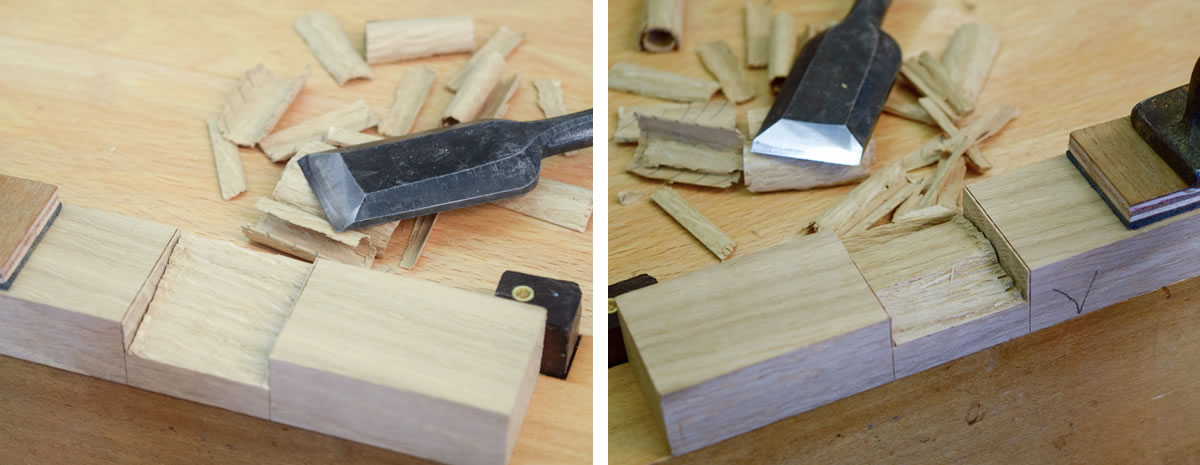
Chisel from one side with upward sloping cuts.
Step 10
Reverse wood on bench, chisel from the other side. Wood now ‘triangular’ in the middle.
Step 11
Set router cutter in table, position work against stop on the UJK Technology mitre fence. Make several passes, gradually increasing cutter height to finish on the gauge line.
Step 12
Check depth with sliding try square.

Step 13
Use broad chisel to clean up knife line cuts. Secure work to the bench, place chisel vertically on knife line and strike with mallet or hammer. Clean out any waste in the corners on horizontal surfaces.
Step 14
Completed joint.
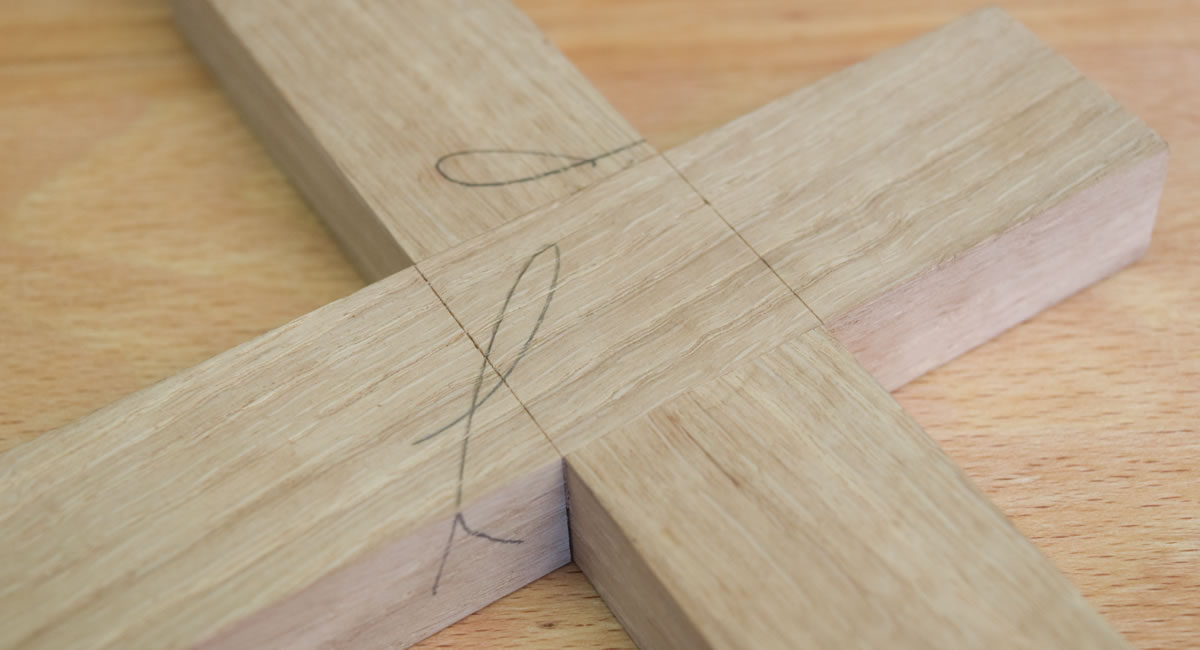
Step 15
Joint fitted.
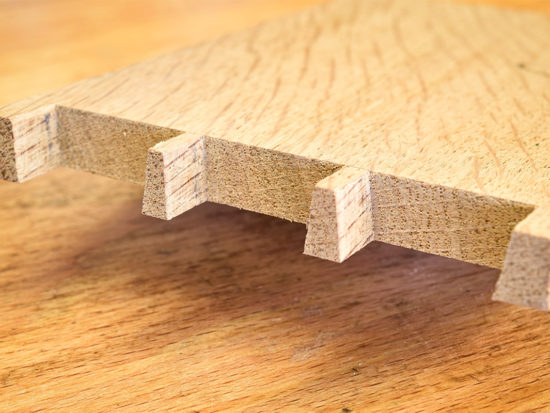
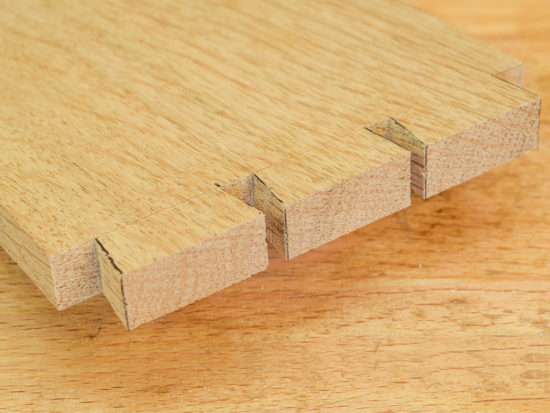

Step 6, 2nd sentence is garbled. I would make sawcuts into the waste just inside the line, allowing for finishing with a chisel on the line.
Thank you and well spotted. It should read 'Saw cuts slightly away from the lines...' That said, you can clearly see the finished saw cuts in Step 8.
I would like to comment about the knife lines, my college tutor from many years ago (Jack Lazenby at Rycotewood College) would have had my guts for garters if I had left knife lines on the visible side of a joint.
Good knife lines are an essential part of marking out but they should only be used where they are needed.
Thanks for the comment Nic and yes, I would agree but in this instance the lines were left to aid clarity in the process and under normal circumstances, they would be removed. Planing off marking out lines is a moot point though, particularly on drawer sides. Some makers remove them and some leave them showing and there's no real consensus as to what is right. As ever, we have to go with with our own personal convictions and I always plane them off.