
How to Set Up a New Bandsaw
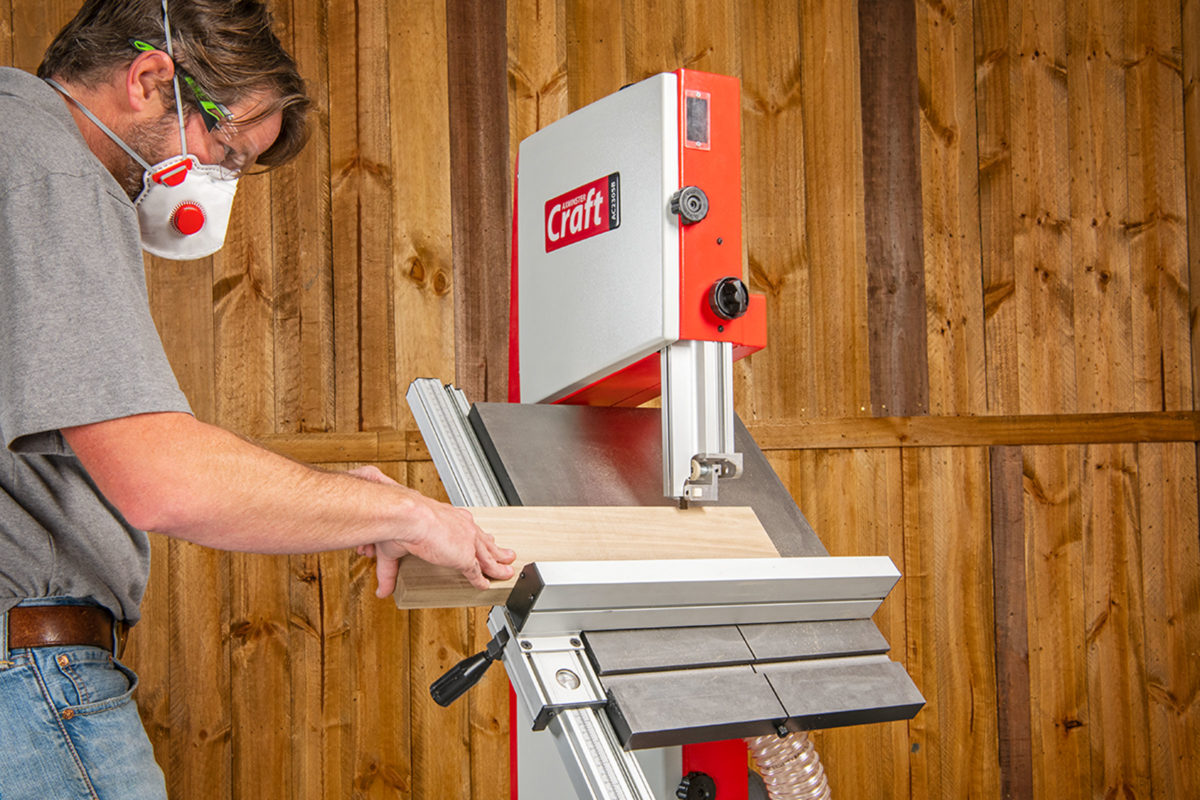
A new bandsaw is a great bit of kit and a must in the workshop. Some new bandsaws will be accurate out of the box and only require a little bit of tuning. This is, however, very rare and you shouldn't expect this to be the norm. If you are prepared to take a little bit of time and effort to set it up correctly, it will pay dividends in the long run.
The techniques described in this article are based on demonstrations by Alex Snodgrass who has provided many insightful tips on how to set up a bandsaw for best performance.
Before we get into the bandsaw itself, one thing you will need to get right is your blade choice. Otherwise all of this tuning will be for nothing. If you are unsure on the blade you need, this guide should help you make the right choice.
Tracking and Tensioning the Blade
These are always the first things that you should do with your new saw. That being said, before you start to open up the doors and get to it, it's best to back off all of the blade guides.
Important
Make sure the machine is disconnected from the power supply.
When tracking, you always want to make sure that the blade is sat on the crown of the wheel, with the deepest part of the gullet in the centre. To do this, you first need to apply some tension to the blade. Then spin the top wheel with your hand whilst turning the tracking control (usually found at the back of the saw). Do this until the blade is in the correct position and lock the tracking control.
A lot of larger bandsaws will have a tensioning gauge on them, however these can be inaccurate. To get blade tension just right, simply place your finger on the side of the blade inside the door and push toward the spine of the saw. You are looking for around 3/8" (9.5mm) deflection here with moderate pressure. If you're touching the spine with little pressure, the blade is under tensioned. Getting no deflection with a lot of pressure tells you that that blade is over tensioned.
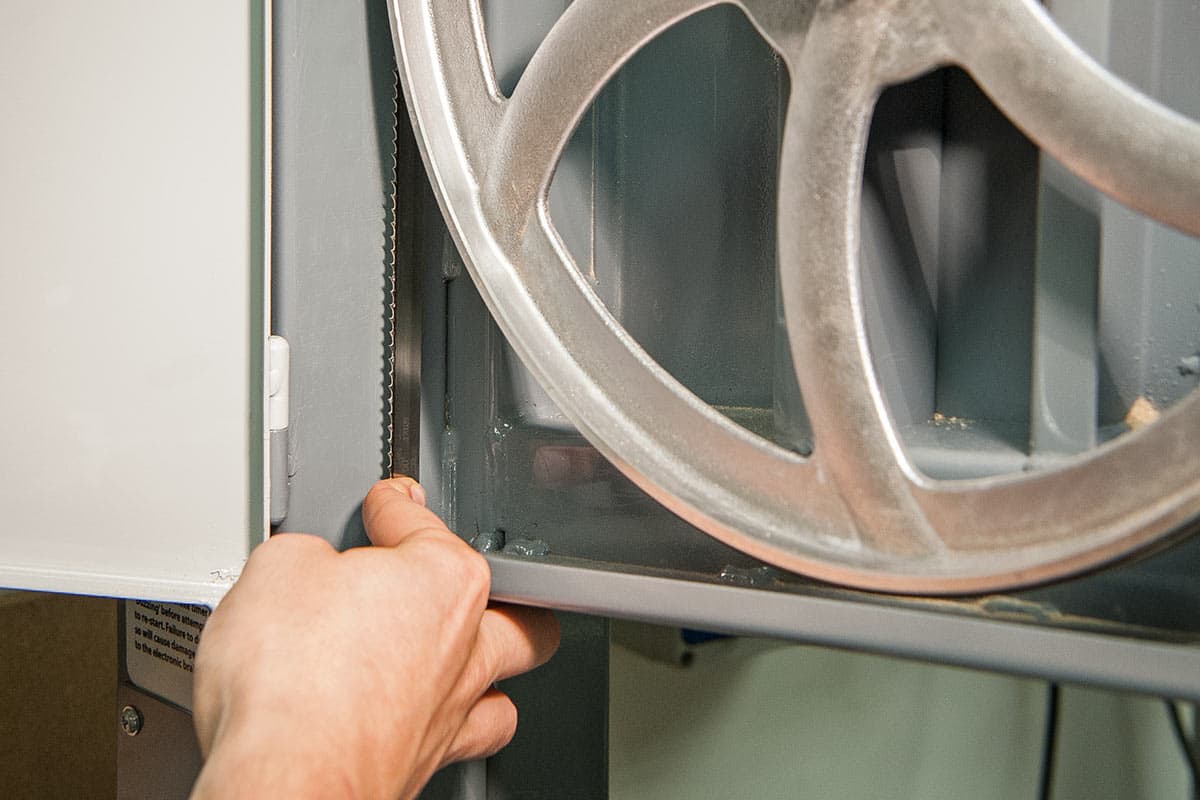
Some manuals may tell you to check tensioning of the blade between the guides and table. We believe this won't be as accurate as doing it at the back of the door.
Top Tip!
Once you have tensioned your blade, always check the tracking again. As moving the wheels up or down to get the right tension can cause the blade to move.
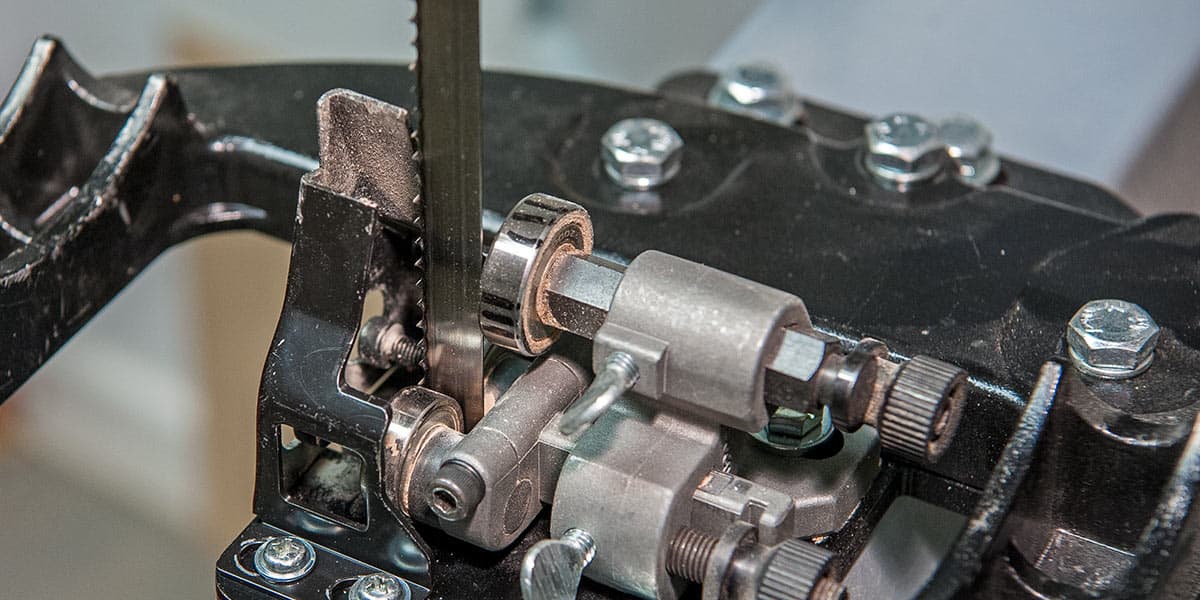
Setting the Blade Guides
Now we come back to those guides. A bandsaw will only cut accurately if the blade guides are set correctly, so these are important.
Let's start with the thrust bearing
This should be positioned no more than about 1mm behind the blade but never in contact with it. Of course 1mm is hard to measure, so bring the bearing in whilst rotating the wheel until it comes into contact with the blade. As soon as the bearing starts rotating, back off slightly and you'll be there.
Lets move onto the side guides
Firstly, we need to get these in position on either side of the blade, around 2mm behind the gullets of the blade. You want these behind the teeth, not in line with them, so that the bearings don't come into contact with the tooth set and damage the blade. See images below for a good demonstration of this...


Bearings either side of the blade
Once this has been done it's time to bring the bearings in either side of the blade. As with most things there are different perspectives on how these should be set. Some people have the bearings touching, others don't, we tend to side with the latter and like them to be set around 0.5mm either side of the blade.

Do not neglect the guides under the table!
Set both the top and bottom in the same way as above to get the best results.
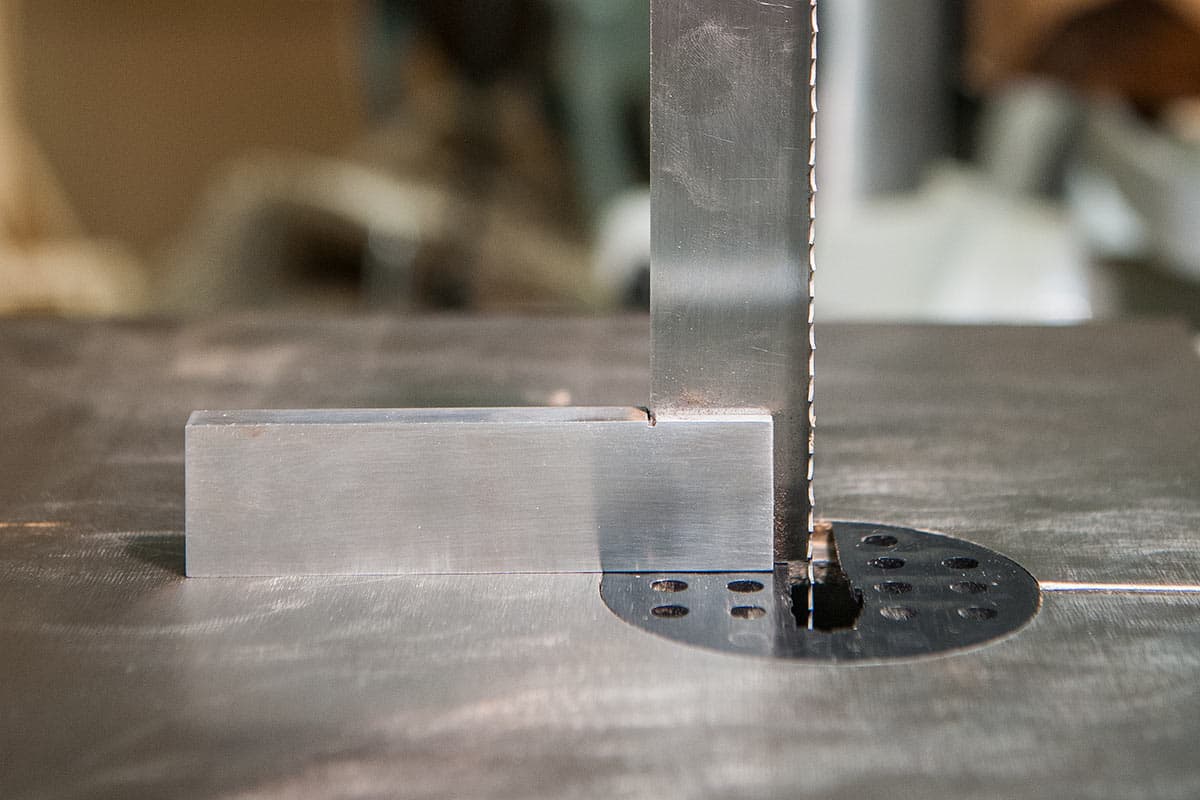
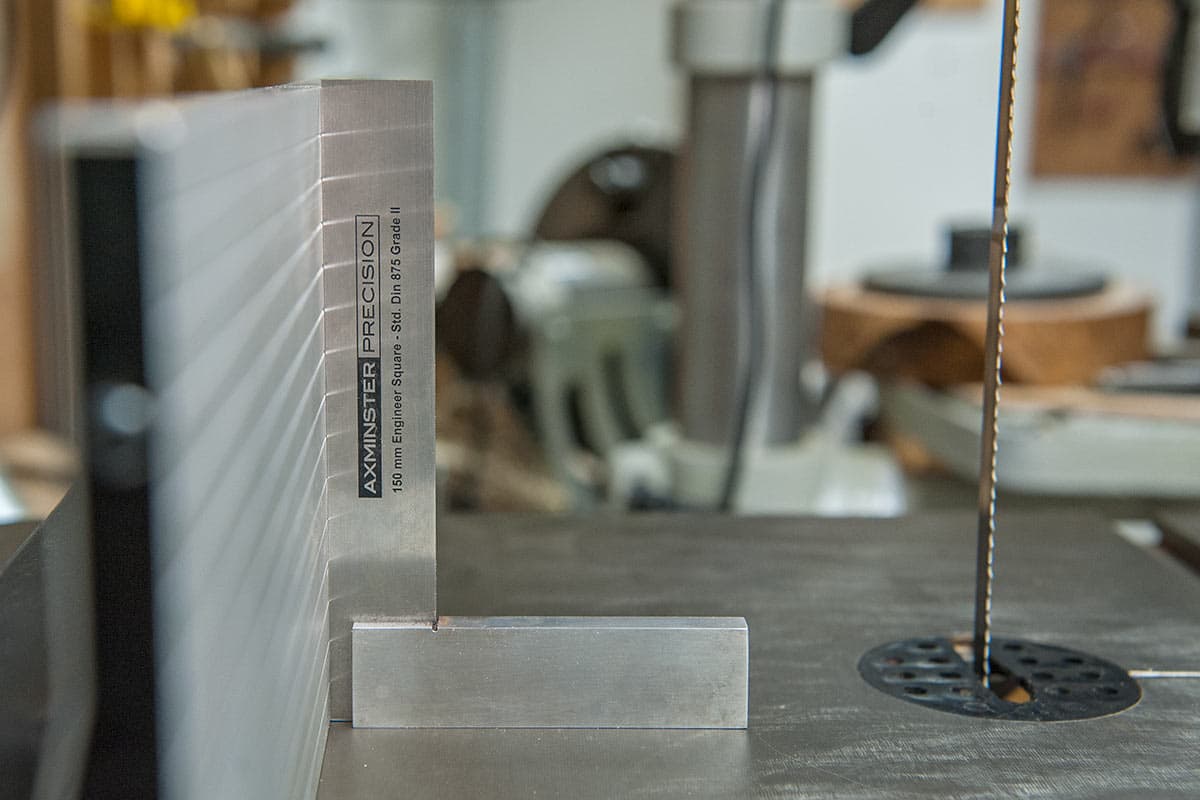
Get the Blade Square to the Table
Set the table so it's sitting on the levelling stop bolt and raise the guide as high as possible. Now place an engineer's square up against the blade and check there are no gaps. If there are, you can make changes by moving the table and the levelling stop bolt until it's exactly 90 degrees. Then set the bolt and you won't have to think about this again.
Setting the Fence
Once again, this is easily done with an engineer's square. Lock the fence into place and push the square up against it. If it's out of alignment, slight changes can be made to it on the fence rail. If your bandsaw comes with a sub fence, it's also good practice to check this as well.
Blade and Fence Alignment
As the blade and fence are going to be working together in most instances, it's always good to check they are aligned to each other. This was once a bit of a faff but can now easily be done with the UJK Technology Bandsaw Buddy. Simply place the Buddy up against the blade, using the recess to counter the tooth set. Then bring the fence up against the Buddy and check the alignment. Any changes that need to be done can be done at the base of the fence.


Now all adjustments are complete. Reconnect the power and switch the saw on for several minutes. Check blade tracking and listen out for any noises that sound like they don't belong, or excessive vibration. If all is ok, your saw is set up and ready to go!


Hi Mike,
"9.5mm deflection here with moderate pressure"
Sadly, I have no idea what moderate pressure might be! I can get between 4mm and 20mm with what I think is "moderate" (smile). Is there any way you could suggest so that I can set a tension more accurately, please? Many thanks.
Shame on you Axminster to blatantly copy the set up procedure by Alex Snodgrass and not credit him.
We do not condone the copying of content and were unaware that this article was taken directly from another content creator. We have credited the original content producer as should have been the case originally. We apologise if we have caused any confusion and always appreciate your feedback. Many thanks, Harriet.
Not sure why this information is not in the manual supplied with the bandsaw. I found this article because I could not find the information in the manual. Could it be added to all the manuals ? The manual I have is dated 24/04/2017 and it could do with this information being in it.
Richard
DOH ! just had tea and read through and it is in the manual - please delete my post.
Richard
The bandsaw blade is an essential tool for woodworking. Its primary advantages include accuracy, precision and versatility. However, the choice of the blade matters the most because if you select the wrong blade for the job, it will do more harm than good. No single blade can suffice all your requirements. Understand your requirements and decide the length, width and teethper inch (TPI) along with right tooth configuration to get the best outcome.