The Resourceful Woodworker improves The Shooting Board
Herewith, this is the last entry about my particular variation on a shooting board. Any more stuff on this topic and I fancy you may well lose the will to live, as I almost did the other day, but that, as they say, is an entirely different story.
I’ve been rattling on about shooting boards for some time now, because as a hand tool user, they’re just about the most useful jig or accessory that you can build, but there’s a couple of little extra gizmos that I’ve added to make them even more adaptable.
The first is very simple. It’s an addition to plane picture frame mitres and consists of a lipped piece of board with one corner planed off at 45°. You’ll need an accurate mitre square to check it’s a true 45°, but it’s easy enough to alter to get it spot on if you make up a trial picture frame. Any discrepancy in the mitres is easily rectified with a couple of very fine shavings from one end or the other on the inclined section.

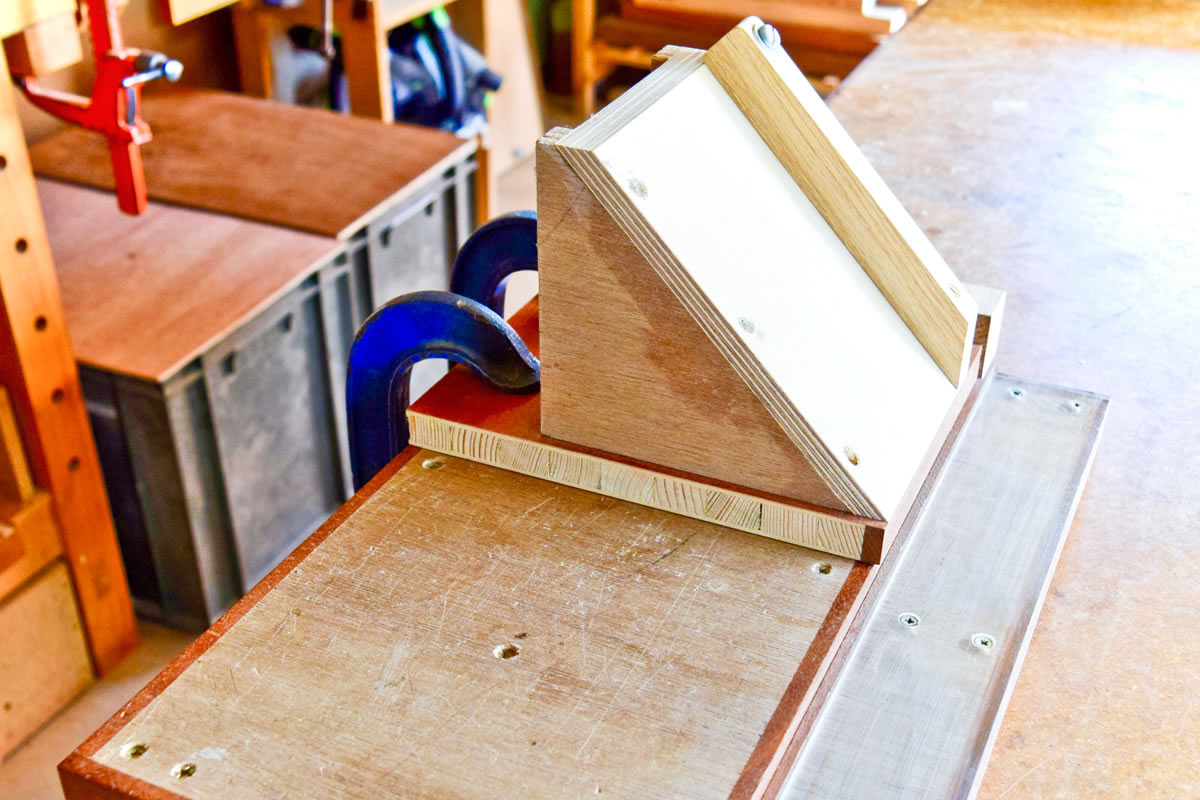
The second addition is slightly more complex and is a long mitre attachment for making boxes.
The construction should be fairly self-evident as it’s just screwed and glued together. The most critical bit to get right is the two 45° angled triangles, which require some careful planing and checking to ensure they’re dead true.

The fence works on exactly the same principle as the one on the main shooting board, meaning a very tight countersunk screw at one end and a loosely fitted pan head/washer combination at the other. The materials used aren’t fancy, merely odds ‘n’ ends from the scrap box and I haven’t been overly careful with the use of the wood screws either. The main thing to bear in mind is to be accurate in preparing the individual bits, especially the two triangular pieces already discussed.
As ever, if you’ve any questions, please don’t hesitate to leave a comment at the end of this entry.